It is time for changing your hairstyle? You don’t need to visit a hairstylist if you want a hairstyle change at all. All For Fashion Design today presents you with a magnificent collection of DIY hairstyle ideas that you can make on your own. There are only a few steps that are parting you from your ideal DIY hairstyle. Try any of the DIY hairstyle tutorials presented below and see how your look changes immediately on better. We are sure you will enjoy making any of the hairstyles below. Scroll down the page to find out your favorite one.
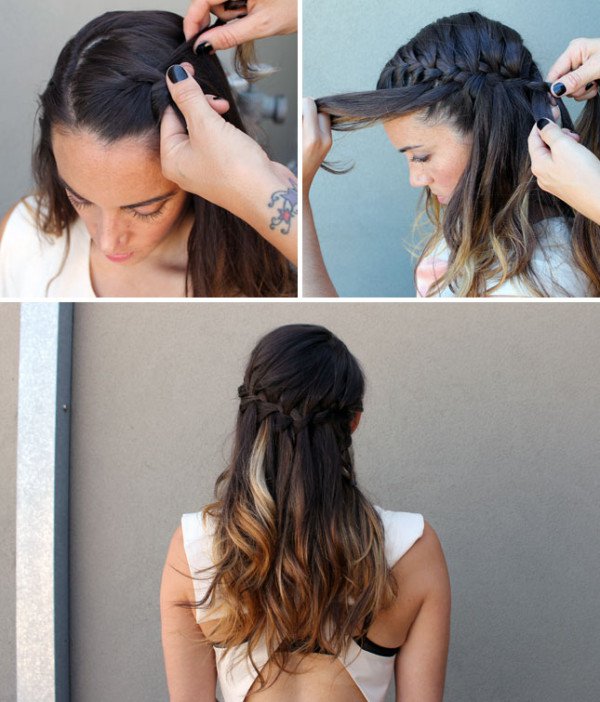
Waterfall braids DIY hairstyles for long hair
Are you interested in learning the easiest way for making a waterfall braids hairstyle? If yes, then don’t miss the easiest DIY hairstyle tutorial ever. You are only a few steps away from the most beautiful hairstyle for long hair. Here they are:
- First, part your hair on its natural side.
- Grab a small piece of hair and divide it into 3 equal sections.
- French braid for 2-3 inches to secure the waterfall and make sure it doesn’t fall in your face.
- Drop the top section of your braid and let it fall.
- Pick up a new section of hair directly behind where you have dropped the top piece earlier. The new piece will act as a new section of your French braid.
- Keep moving around the head repeating the same procedure from step 5 all the time. *Remember that every time you grab a section of hair from the top of your head to add to the braid, you need to drop it down and replace it with a new section!
- /8. When you are done and you finally reach the other side of your head, secure the end of the braid using pins.
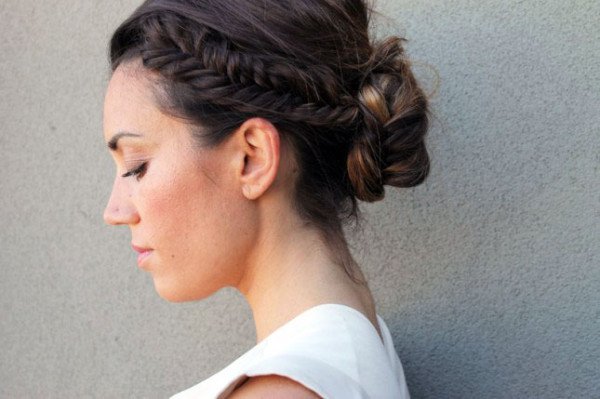
Fishtail up-do
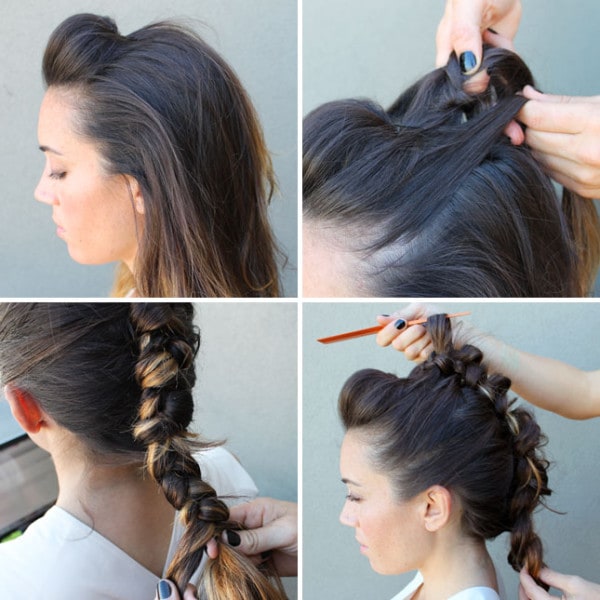
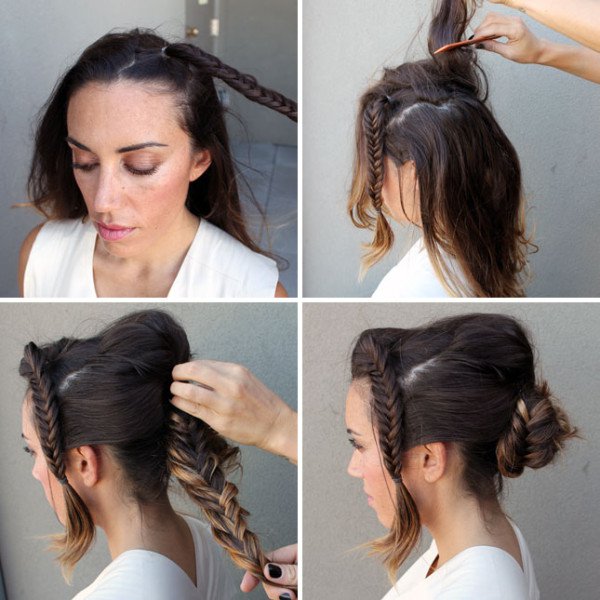
What do you think about adding a few fishtail details to your hairstyle instead of choosing a simple bun? This DIY hairstyle tutorial will show you how to make it as a professional. There are only a few steps that you need to follow. Here we go:
- Section your hair into two ponytails, one with the top of your hair and the other with the bottom of it.
- Pull a piece out of the top of your top pony and braid the hair in a simple fishtail braid style.
- Put the lower pony into a bun.
- Backcomb the rest of the upper pony so that you give it more volume.
- Make pomp with it and secure with a bobby pin.
- Fishtail the rest of the pony and wrap it around the bun.
- Repeat the same with the first fishtail braid.
- Secure everything with bobby pins. Voila, you are done!
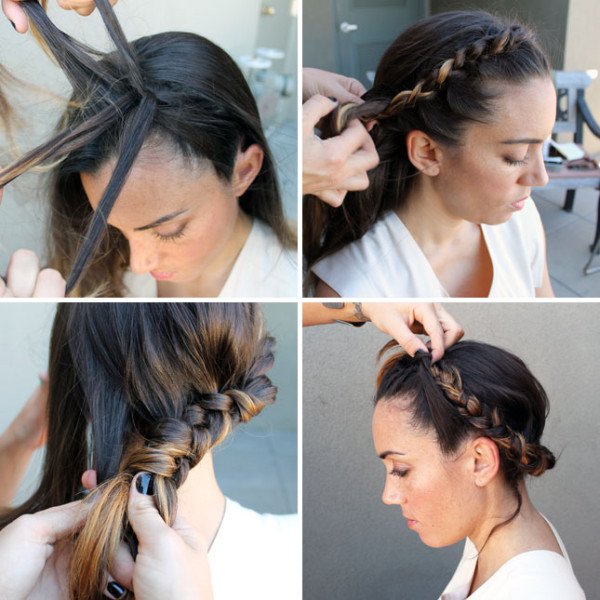
Pulled-back hairstyle with a romantic jeweled headband
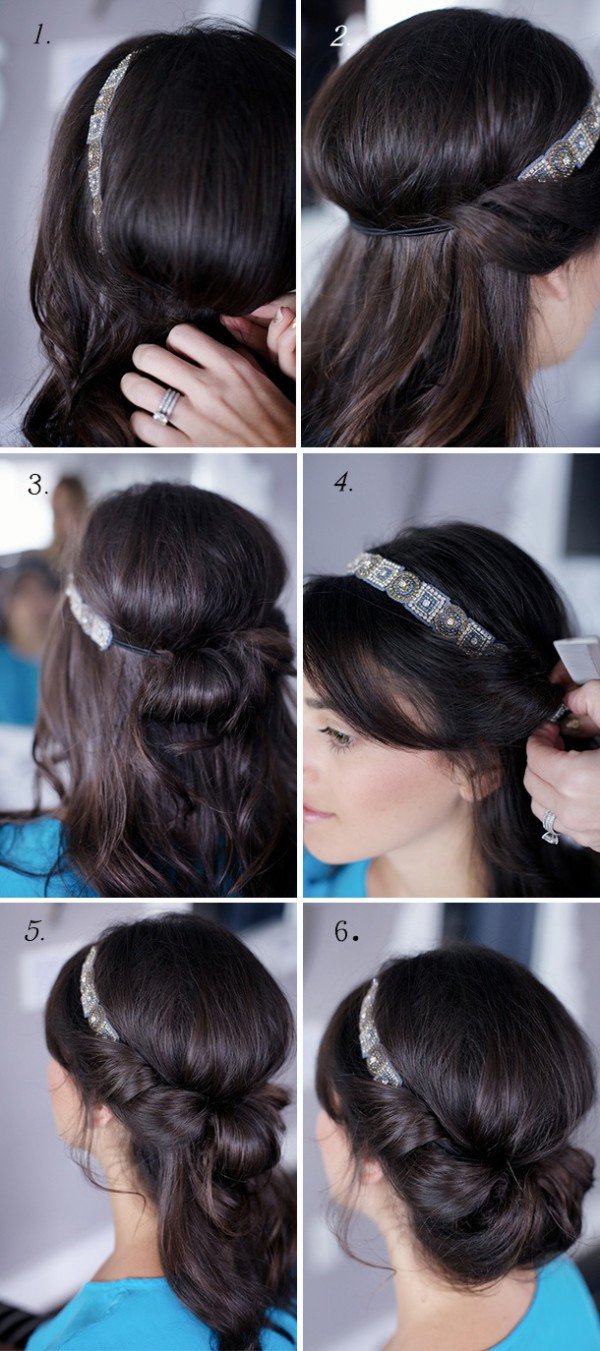
Are you ready for some romantic and unusual hairstyle that will make you look amazing this spring and summer season? Scroll down to find out the steps to get the most eye-catching DIY hairstyle ever.
- Slide your jewelry headband around the crown of your head. Begin with lightly curled hair that is teased at the crown.
- Pull hair in small sections from below the headband starting at the front of your hairline. Then tuck the hair as shown in the picture.
- Continue working towards the back of your head. The sections you pull from the hair can vary in size as well as can be teased, pulled, and loosened as you want them.
- Repeat the same procedure with the other side of the hairline.
- When the layer is tucked completely, you can stop and leave the hairstyle up-half down. The result will be amazing.
- Also, you can continue by tucking bottom hair up and around as in the pictures below.
- Finally, reinforce the hairstyle with bobby pins and spray all over.
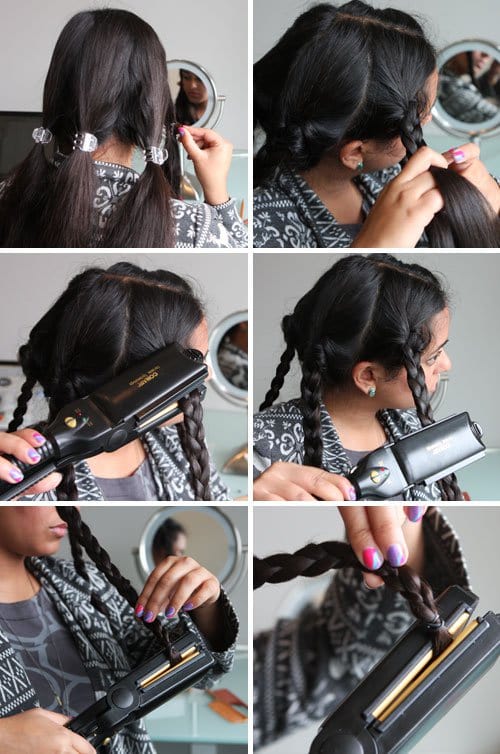
Pretzel Braid
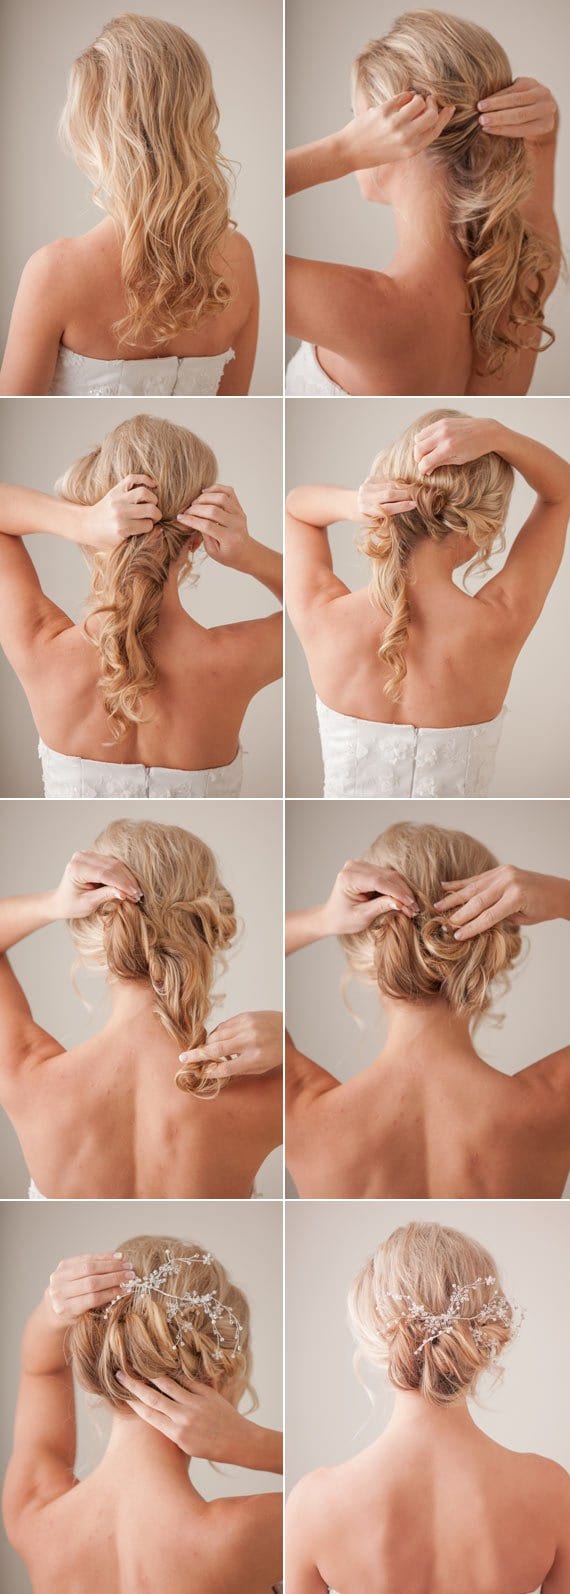
Are you ready for some gorgeous pretzel braids? This DIY hairstyle is so romantic and breezy and will be the most appropriate hairstyle you can ever choose for an evening wedding or outdoor summer party. Here are the steps to get your newest hairstyle.
- First, make two pigtails using rubber bands. Make them a bit higher up on your head.
- Then, braid each of the pigtails securing them with a runner band on the ends.
- Remove the top rubber bands from the pigtails and cross one braid over the other one.
- Create a sort of letter C using the braid that is now on the top. Secure with a bobby pin.
- Repeat the same procedure with the other braid and pin again. Continue doing the same up and over until there is no more space for the braid left out there.
*If you want to get a nice sort of pretzel or knot shape tuck the ends of both braids behind the knot and pin to secure them.

