Are you ready for some inspiring ballet shoe makeovers? If yes, continue scrolling down the page because we have selected the easiest DIY ballet shoe makeovers ever, for you. These DIY shoe projects are everything a woman needs to know if she wants her old shoes to look amazing and like new ones. Enjoy!
1. How to make Pom Pom shoe clips
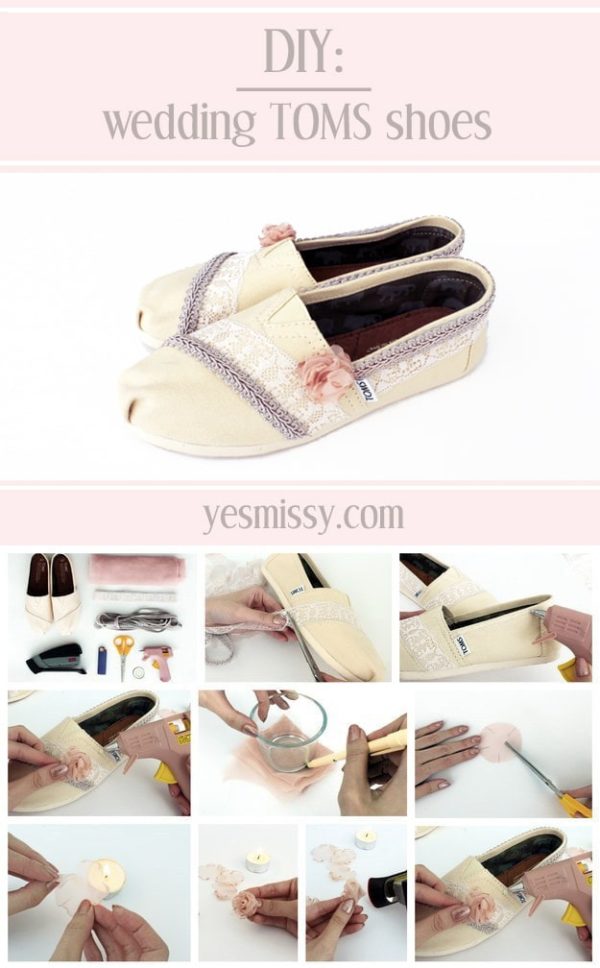
2. DIY Toms with a touch of lace and flowers
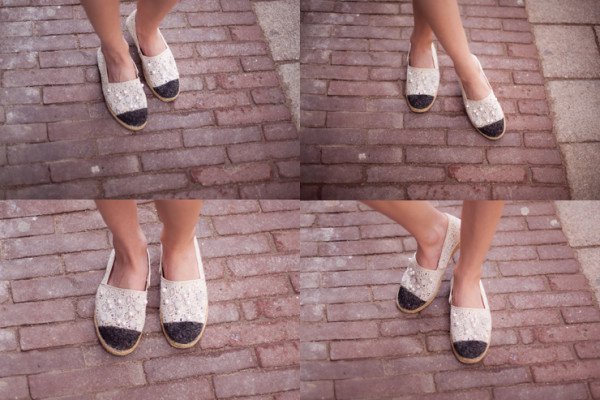
If lace is your favorite fabric, then you may want to experiment with some ballet shoe makeovers including lace. Here is one that you will certainly adore.
The materials:
- A pair of TOMS
- Lace
- Trimming
- Chiffon fabric
- Scissors
- Lighter
- Tea light
- Stapler
- Glue gun
The steps:
- First, measure the amount of lace needed for the project. Take the lace and line it up against your TOMS. Snip off any excess lace.
- Using the hot glue gun, squeeze and put a line of glue on the place where you want your lace to go. Press the lace along the glue to secure it well.
- Now measure the needed amount of trim and attach it in the exact same way as you did with the lace piece.
- Time to make an outline for the chiffon rosettes. Trace a 1.5” diameter circle on the chiffon fabric and carefully cut out 8 chiffon circles.
- Cut out the petals. Cut five 1/3” slits into each of the chiffon circles.
- In order to properly shape the petals, light the tea light and gold each chiffon circle about 1’ away from the flame. The edges of the circles will slightly melt, creating this way the petal effect. Repeat the same procedure with all 8 of your chiffon circles.
- Fold the petals into rosettes. To do it, take 4 of the chiffon circles and stack them on top of each other. Fold the stack in half to form a half circle. Again, gold and form the rosette.
- Now, use the stapler to secure the shape of the rosette.
- Voila, your ballet shoe makeover is finished!
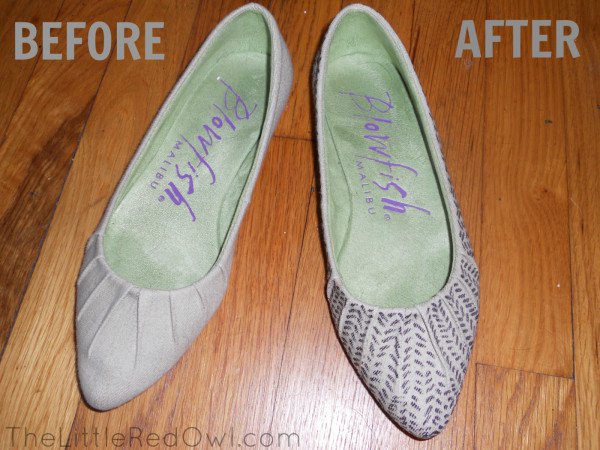
3. Shoes refashion
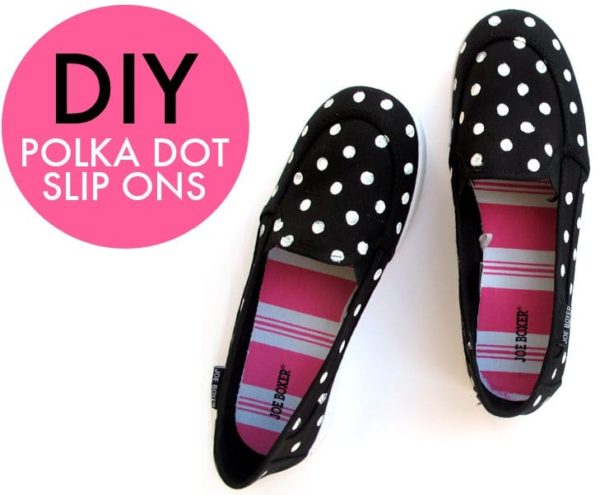
4. DIY polka dot slip on
Are you interested in some adorable DIY ballet shoe makeovers? This is one that you will definitely love, especially if you are a polka dot pattern lover.
Here are the supplies needed for the project:
- Shoes
- Fabric paint in the color of your choice (the best combination even is to use black shoes and white fabric paint)
- An un-used pencil eraser on a pencil
- A polka dot stencil or a ruler
The steps:
- First, take your stencil and trace where you will place the polka dots. We recommend you use a pencil with an eraser that is slightly larger than the polka dots you will draw later. If it is not, then do not draw a full circle, but just place a small dot on the place so the pencil mark is not seen on the shoe when you finish.
- Once you have marked the places where you will be drawing the polka dots pattern, it is time to start painting the shoes.
- Dip the pencil into the paint and then place it on the marked dots.
- Repeat the same step until you have the entire shoe covered in polka dots.
- Let your shoes fully dry before you wear them.
Voila, you are done! You can now enjoy your new ballet shoes.
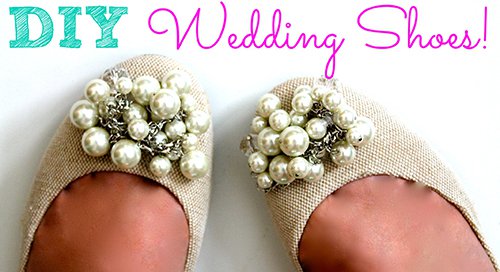
5. DIY Wedding Shoe
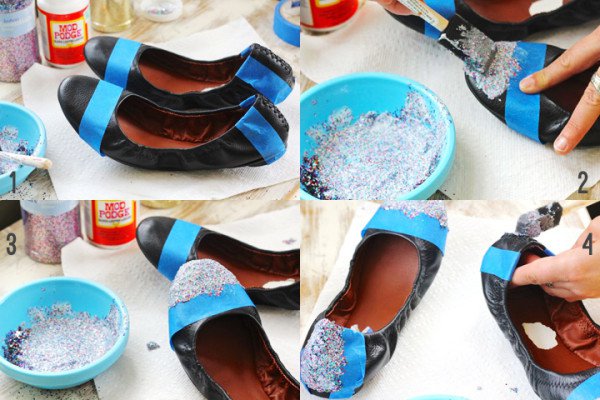
6. How to make glitter shoes
Looking for some shining and interesting ballet shoe makeovers? Here is the easiest way to transform your old and boring ballet shoes into glitter shoes in a few easy steps.
Here are the materials needed:
- Ballet shoes
- Mod Podge Gloss
- Fabric paint
- Glitter
- Painter’s tape
- Mixing container
- Paintbrushes-detail and medium
The steps:
- Start with clean shoes. If they aren’t new, then clean the first and let the dry.
- Take the painter’s tape and use it to cover all the areas of the shoe that you don’t want to cover with glitter.
- Paint the areas of the shoe that you want to look glittering using a small brush and fabric paint.
- Measure the Mod Podge and put it into the container. Then, stir in the glitter until fully mixed.
- Take the paintbrush again, and using it, apply the first layer of glitter to the first shoe, on the areas you want to be covered with glitter.
- Let the shoe dry enough. Then, repeat the same procedure with the second shoe.
- Once the first coat is dry enough, it is time for a second one. Again, take the brush and using it apply a second layer of glitter. Let dry.
- When dry enough, apply a third layer of glitter. Let dry completely.
- Voila, your glitter shoes are finished. Time to rock them with some shining outfits.

