Hello, dear fashion girls! In this post, our team has collected some wonderful DIY sneakers makeover ideas that you shouldn’t miss. These ideas are a perfect way to insert new life into your otherwise old and boring sneakers. As approved by the college statistics homework helper, these transformations could be wonderful for your college style. So if you are looking for some new and fresh DIY sneakers makeover ideas for your back-to-school wardrobe, you have found them! Just scroll down the page to explore them!
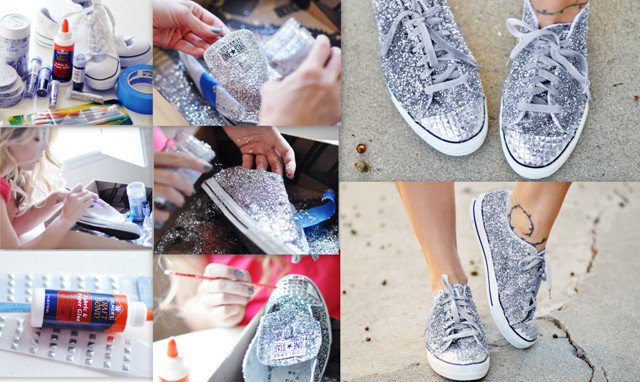
1. DIY Prada-inspired platform sneakers
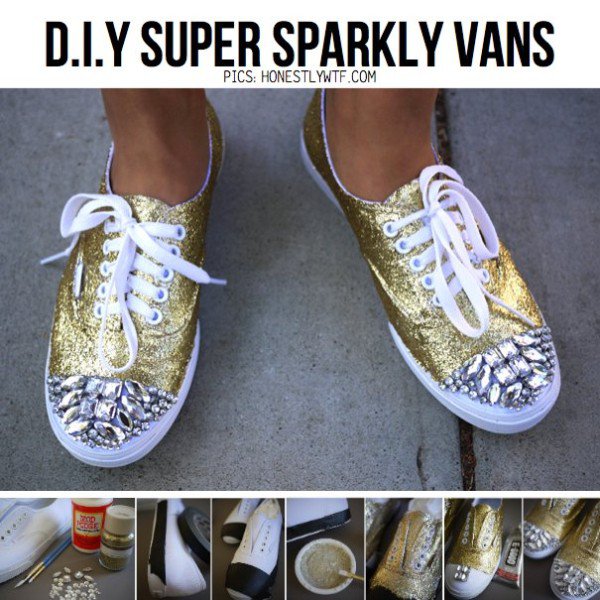
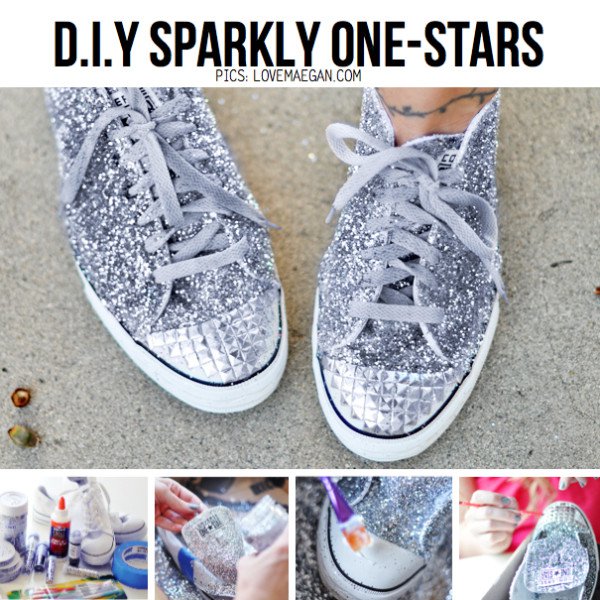
2. DIY Super Sparkly Vans
Buying a new pair of Miu Miu sneakers can cost you a little fortune. This is one of those DIY sneakers makeover ideas that you can copy to get your own glittery Miu Miu-inspired sneakers in only a few steps, and totally on a budget.
Here are the needed supplies:
- A pair of white canvas Vans
- 8 ounces of Mod Podge
- 1, 5 ounces of coarse gold glitter
- 1 small and a medium flat brush
- Assorted rhinestones in settings
- Heavy duty adhesive
- Small plastic tray
- Tape
The steps:
- Tape the edges of the shoes. Cover the rubber soles as well as both toes with tape. This is the area where you will glue the rhinestones.
- Take the small plastic tray and add one part of course glitter to two parts Mod Podge in it.
- Stir to get a homogenous mixture.
- Use the paintbrush to apply a layer of glitter to the shoe. Allow drying for 10 to 15 minutes
- Then, add a second layer of glitter, and a third one until you have hardly covered the white canvas space.
- Remove the tape.
- Using adhesive, glue the rhinestones on the toe in any pattern of your desire.
- Ready to go!
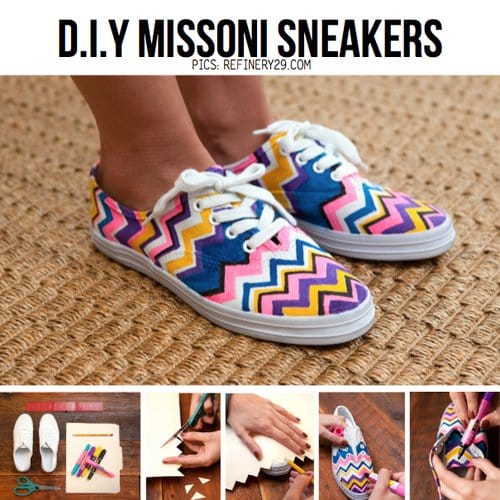
3. DIY Missoni sneakers
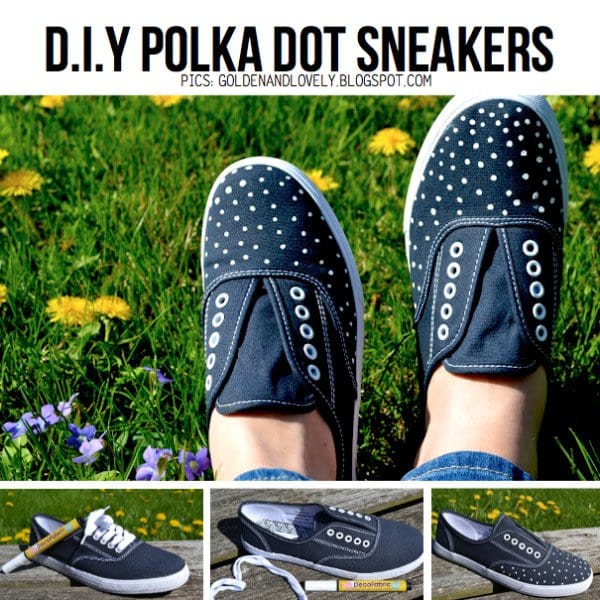
4. DIY Polka-Dot Sneakers
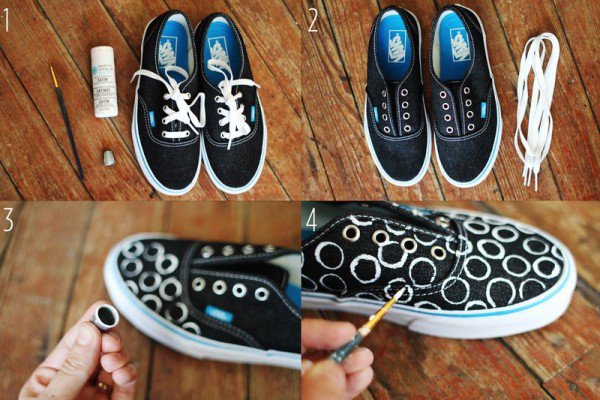
Are you ready for the easiest DIY sneakers makeover ideas ever? The following project won’t take you more than 10 minutes. Once you read the instructions you will see why we call it the easiest project ever.
Here are the needed materials:
- A pair of inexpensive sneakers (you can use black ones so you don’t need to paint them first)
- Permanent white fabric pen
Ready for the steps? It is only one step indeed: you just take the white permanent pen and start drawing a polka dot pattern over your black canvas sneakers. You can use any patterns you like. The polka dot patterns have no specific rules on how to be drawn, so you can be sure that you can’t go wrong no matter the way you do it.
Voila, you are done! Do you see why this is the easiest DIY sneakers makeover idea ever?
5. Splendid Shoe Makeover
6. DIY Sneakers Ideas
7. DIY Studded Sneakers
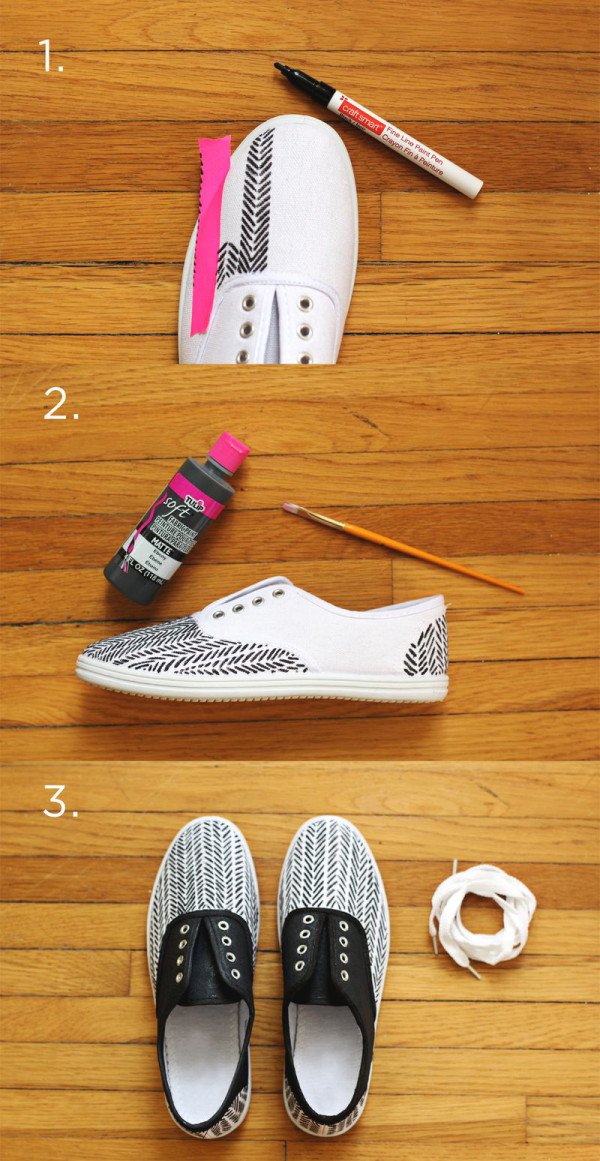
8. DIY Cool Painted Sneakers
9. DIY glitter sneakers
10. DIY Queen’s Day Sneakers Tutorial
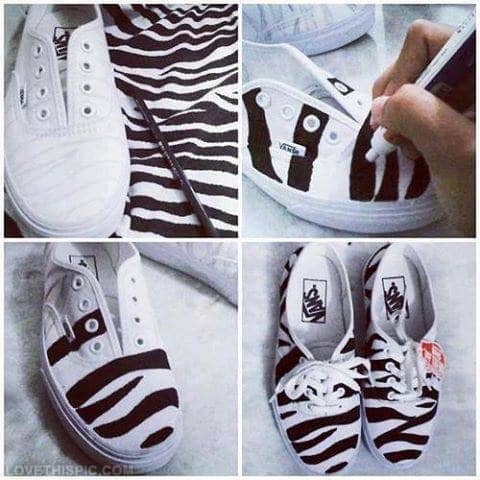
11. DIY Zebra Sneakers
12. Glitter sneakers DIY: MIUMIU-inspired project
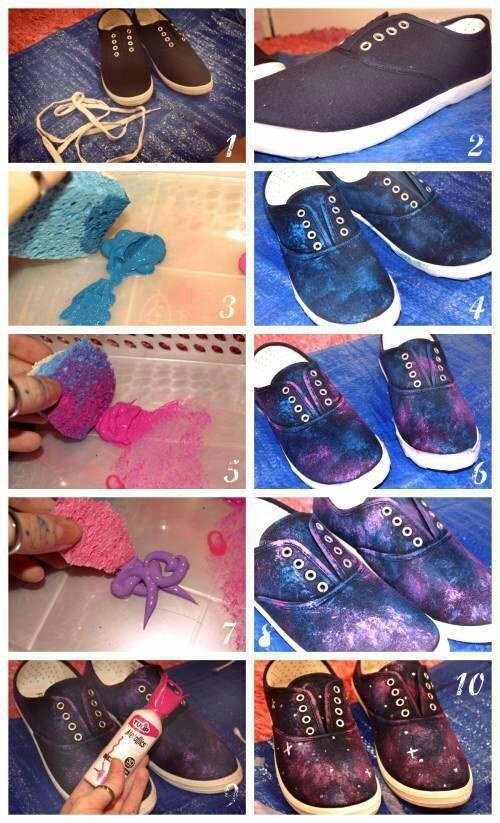
13. DIY Galaxy Shoe
14. DIY ombre sneakers
15. DIY sneakers idea
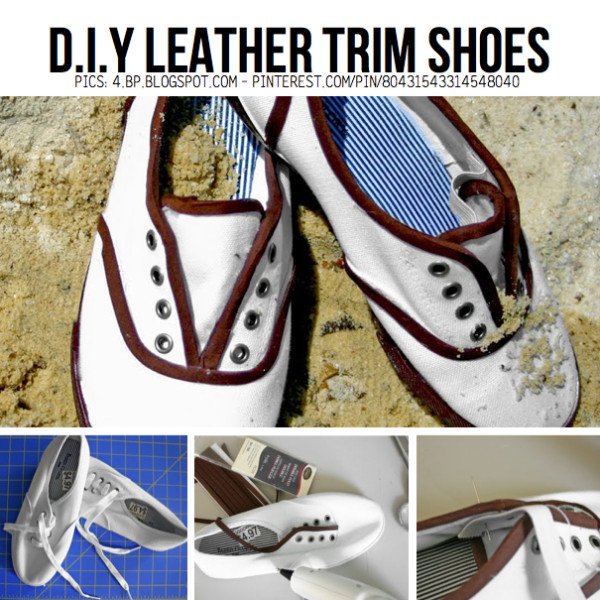
16. DIY Leather Trim shoe
17. Floral vans restyle
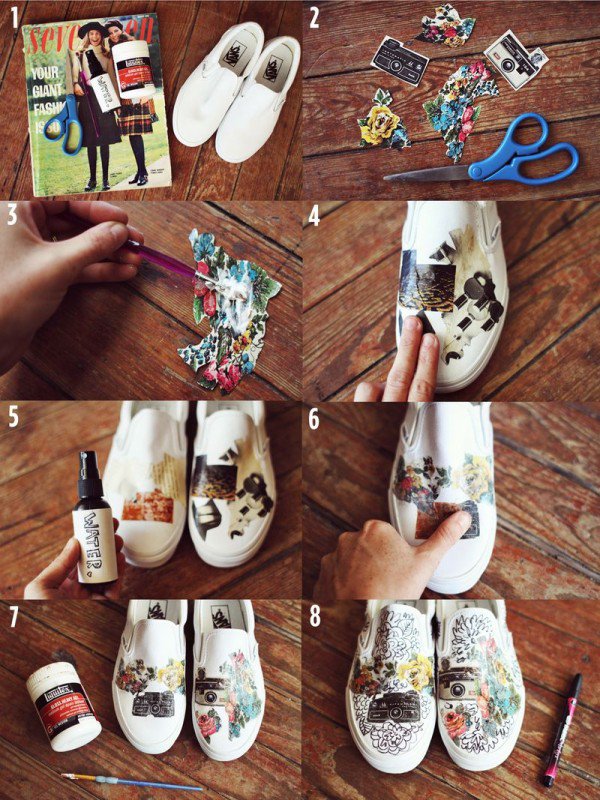
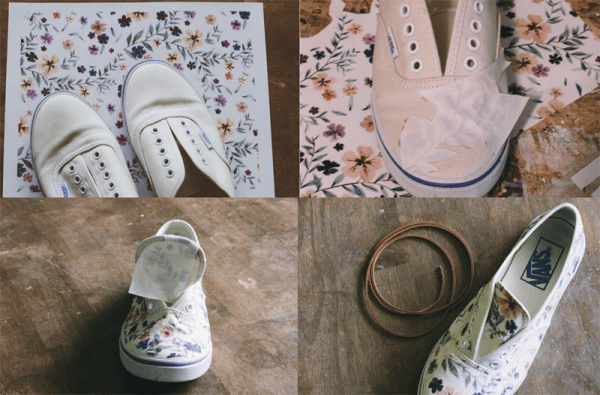
Looking for some super stylish floral sneakers for the upcoming spring season? If you can’t find the ones you are wishing for, do not worry at all. You can make the on your own. In this article with DIY sneakers makeover ideas, we have in the easiest DIY floral sneakers project for you. Here we go:
The materials:
- White canvas sneakers
- Iron-on printed paper
- Leather cord (optional)
The steps:
- Find the design you want to apply to your floral sneakers.
- Print it out on your paper.
- Cut out the designs and iron them on.
- Extra tip: remember to let the image cool down completely before peeling away the paper. Otherwise, you can mess up everything if you try to layer parts of the design.
- Voila, your floral sneakers are done! Enjoy wearing them! We wish you many long walks with your floral shoes.
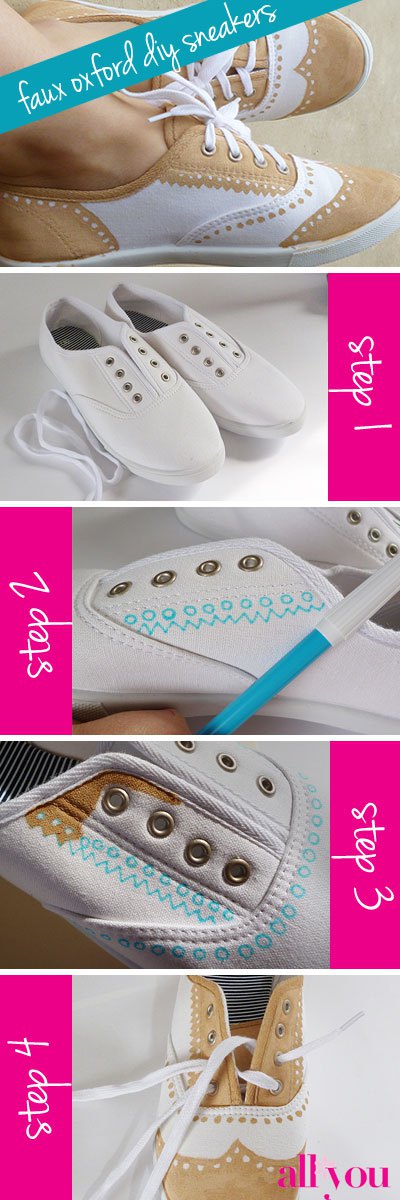
18. Easy DIY: Faux Painted Oxford Shoe
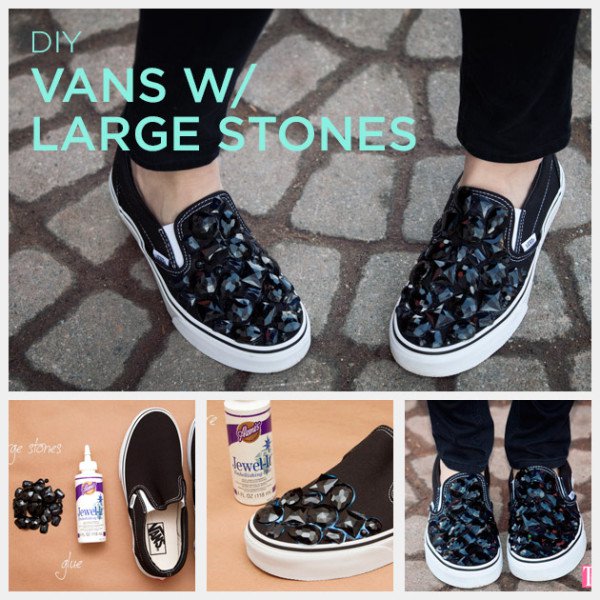
19. DIYvans with large stones
20. Slip-on sneakers are a huge trend
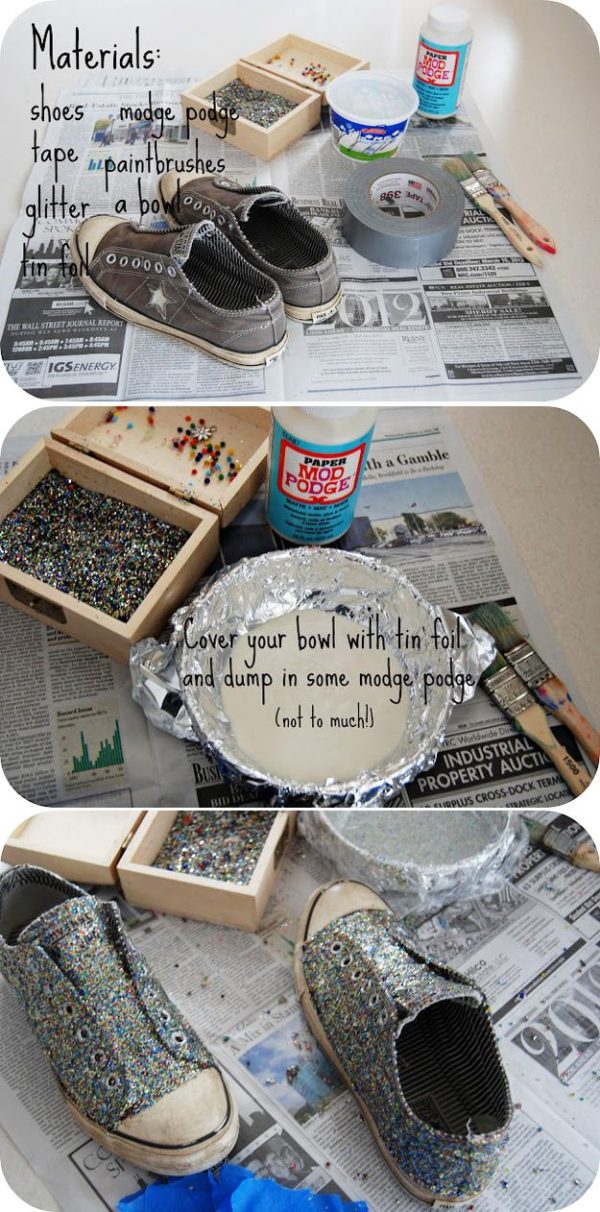
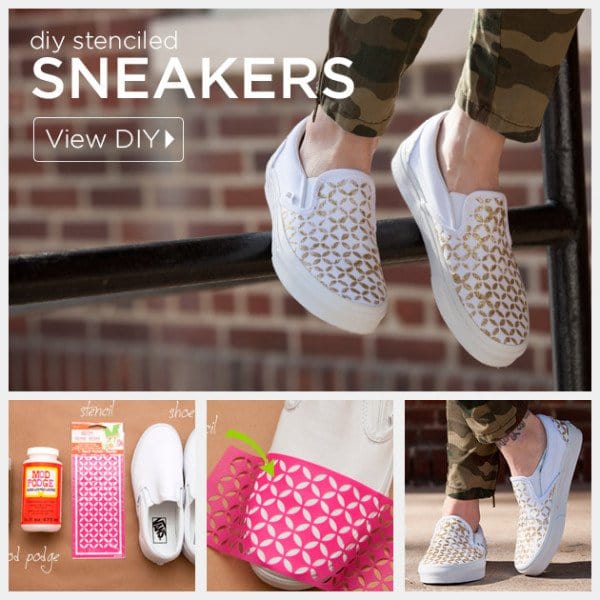
Do you want to try one of the most eye-catching patterns on your new sneakers? We are sharing with you some DIY sneakers makeover ideas on how to do it. One of them is the following one.
Here are the needed materials:
- Mod Podge rocks stencil
- Slip-on sneakers
- Mod Podge
- Glitter
- Sponge
- Brush for mixing
- Bowl
- Toothpicks
The steps:
- Mix Mod Podge and glitter in a bowl.
- Decide where you want your design to be on the shoes.
- Once you have decided, lay the stencil sticky side down on your shoes and smooth it out to make sure it is flat on the surface of the sneakers.
- Take the sponge and gently press the Mod Podge and glitter mix onto your shoes through the stencil.
- You may want to wash the stencil as you move it around your shoes. You are allowed to, just be careful to dry it completely before putting it back on the sneakers.
- Work in small sections until you have the desired area covered with the design.
- Let dry.
- Finished!

