Did you wake up messy hair day? Do not worry at all. In this article, we are sharing with you some quick DIY hairstyle ideas that will solve your bad hair day problems immediately. Scroll down the page to explore some inspiring DIY step-by-step hairstyle tutorials that will help you look amazing all the time. The best about these hairstyles is that they won’t take you more than 10 minutes in the morning. Prepare for looking absolutely stunning at the office, for lunch with friends, or for any occasion you need. These quick DIY hairstyle ideas will make your life easier. The hairstyle is one of the essential keys to a perfect look, so don’t miss looking stunning.
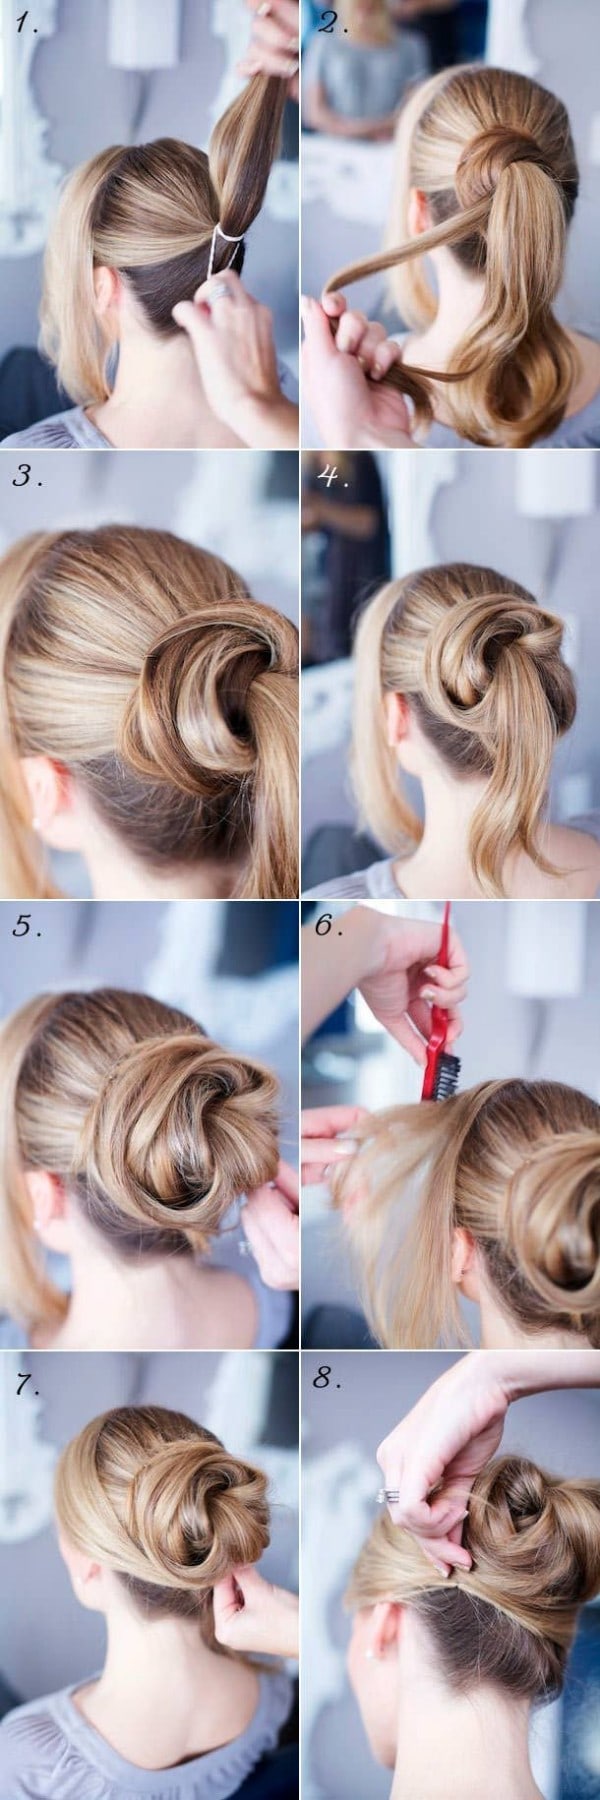
Easy updo in 6 steps
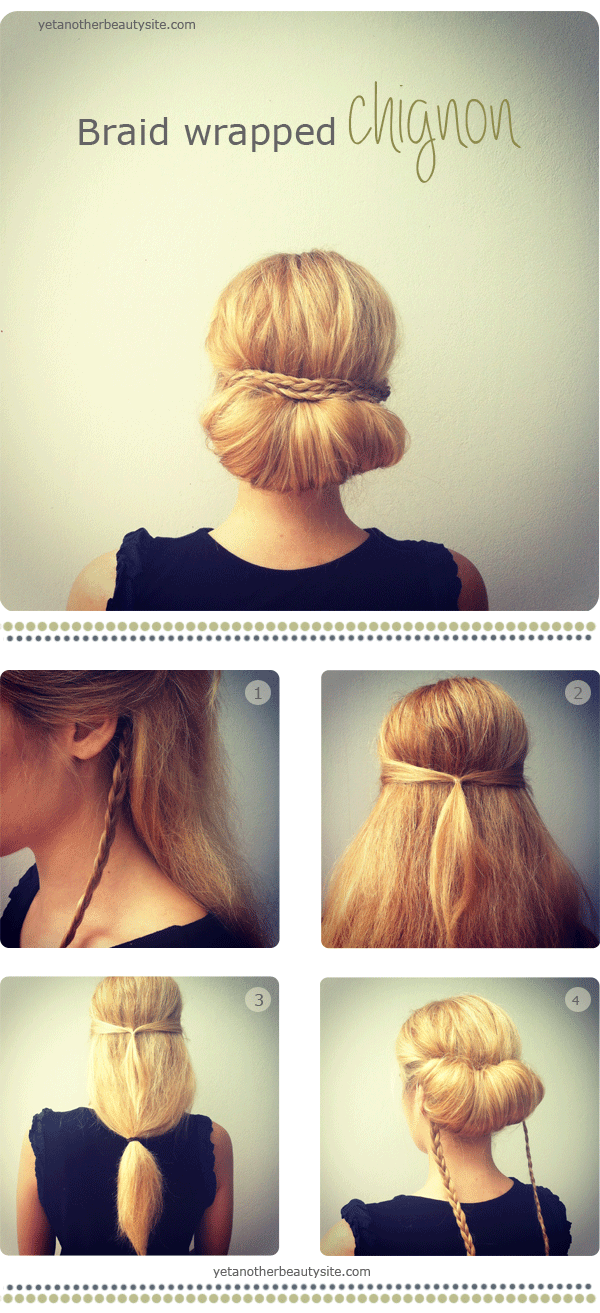
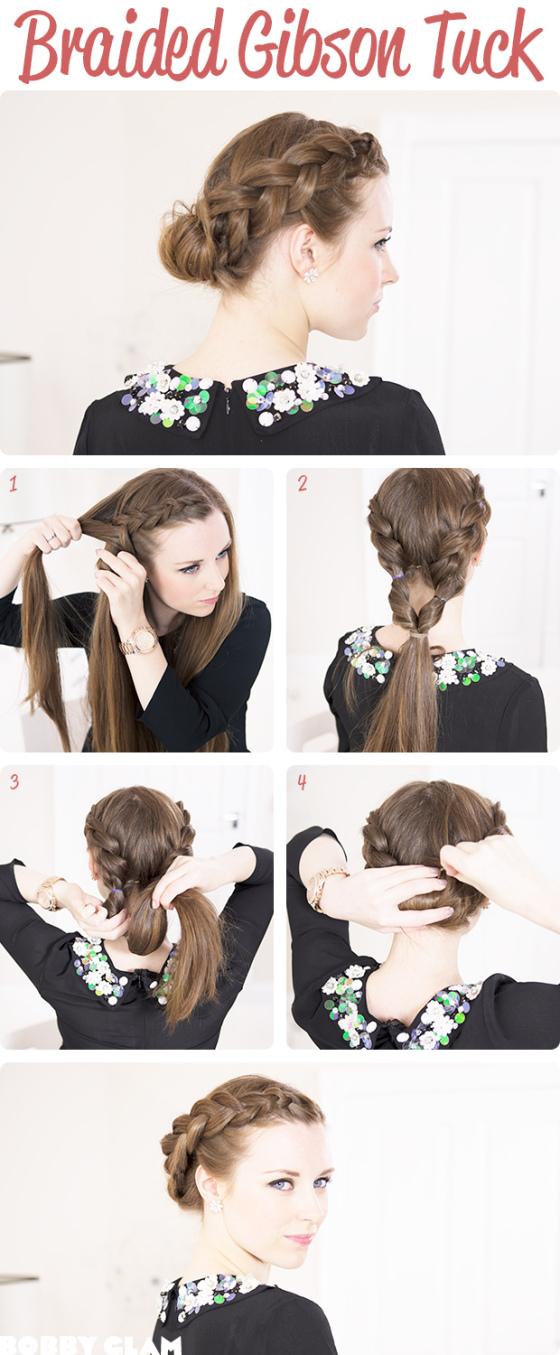
Braid wrapped chignon
Rope braid bun
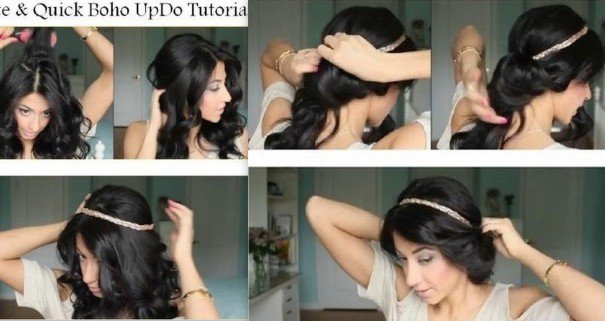
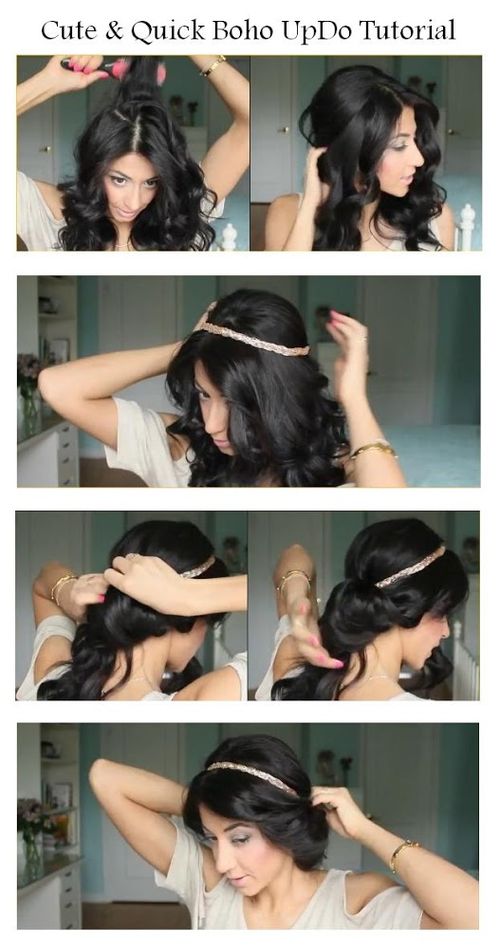
Cute and quick boho updo tutorial
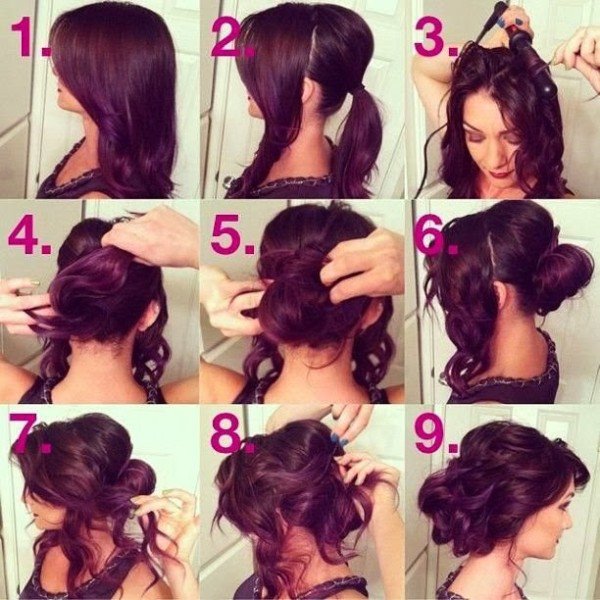
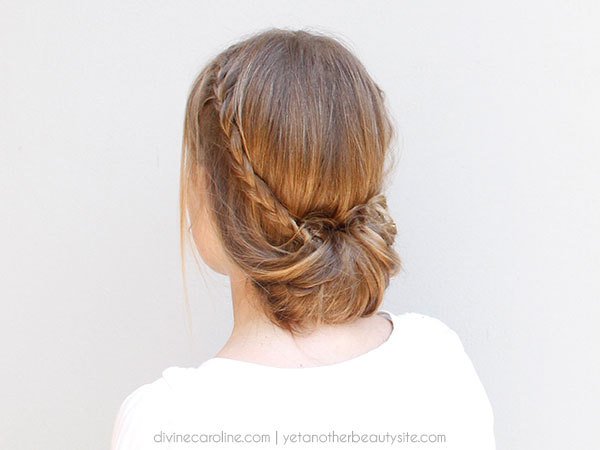
DIY romantic updo
Hey ladies, are you ready for a perfect and quick DIY hairstyle tutorial to make the easiest romantic updo? Here is how to get the perfect hairstyle in only a few steps:
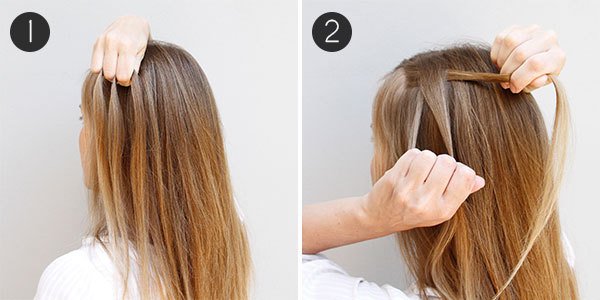
Step 1: Grab the hairbrush, spritz the bristles with a high-hold hairspray and comb the hair back so that your natural part disappears. Sweep the ends of the hair back off your shoulders so the hair lies flat against your back.
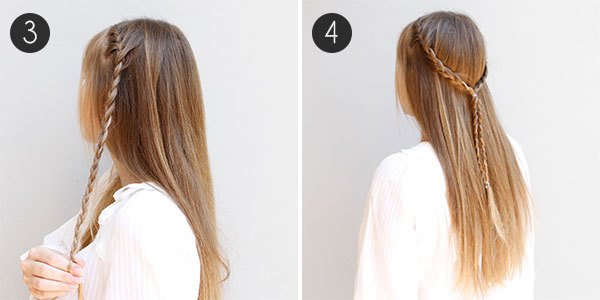
Step 2: bring two small sections of hair (one on either side of the head) forward. Braid each section. Secure with an elastic. Begin to gently pull on the outer sections of each braid to create a thicker-looking plait. Spray with hairspray to seal the texture.
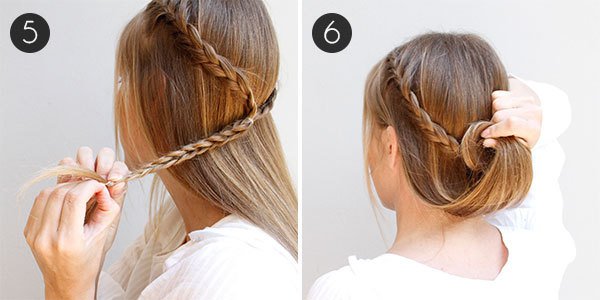
Step 3: Repeat the same procedure with the other section of hair. Once both braids are done, drape them across the top section of your hair to create a braided headband. Secure with Bobby pins.
Step 4: Gently backcomb the mid-sections to give your updo some extra texture and volume. Tease the hair and spray them with hairspray. Then secure the entire hairstyle with Bobby pins that will hold everything in place.
Your updo is successfully finished!
Retro updo
Romantic quick DIY hairstyle
Wrap around braid
The wrap-around side braid
Here is another quick DIY hairstyle that will save you time in the morning and will leave you looking like you woke up a perfect hair day. There are only a few steps you need to go through to get the hairstyle of your dreams.
The steps:
Step 1: First, brush your hair swept to one side.
Step 2: Take a small section of the hair just above your ear and split it into three sections.
Step 3: Do a traditional French braid by crossing sections over each other. You can also try a Dutch braid by crossing sections under each other.
Step 4: Continue braiding the hair and try to keep the braid low and tight.
Step 5: When you reach the area just below the ear you should add the final section of your hair if you have tried Dutch braid. That will keep your braid falling nicely on your shoulder.
Step 6: Finish braiding to the ends of the hair. Tie off.
The easy knotted updo
Are you ready for the easiest DIY hairstyle ever? This quick DIY hairstyle won’t take you more than 10 minutes and will leave you with surprisingly amazing results. All you will need to make this easy knotted updo is the following:
- Brush
- Hair serum or hair pomade
- Two hair ties
- Bobby pins
Here we go with the steps:
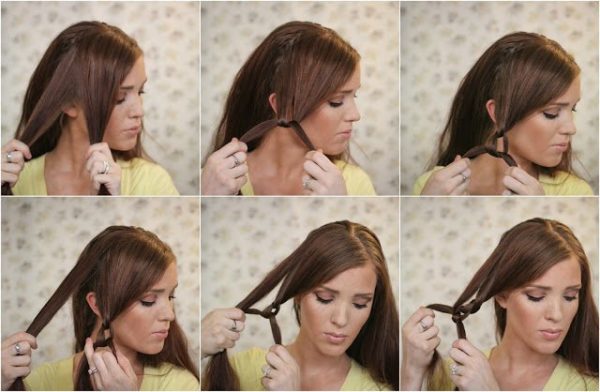
Step 1: Brush your hair smoothly. Then add a bit of the smoothing serum to the outside to add some extra shine to the hair. Using the brush draw a line from the top of your ear to your part and separate that section of the hair.
Step 2: Split that section in two. Then tie it in a half knot and once again in a full knot right below your ear. Now, separate another section of hair 2-3 inches wide and add it to the knotted strand closest to it. Repeat the same and tie a half knot as previously done.
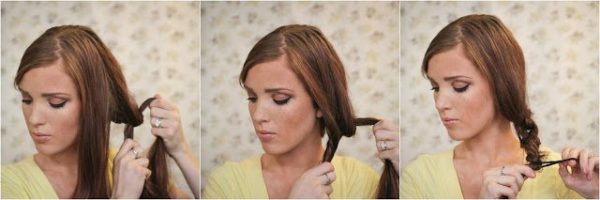
Step 3: Repeat the same procedure, moving around your hair. You will need to pull 6 to 8 more sections until you reach the other ear. When you get to the last section of hair, take it and twist it slightly over itself back towards your hair. Then combine it with the closest knot strand. Finish the hairstyle by continuing to knot all the way to the end. At the end secure with a hair tie.
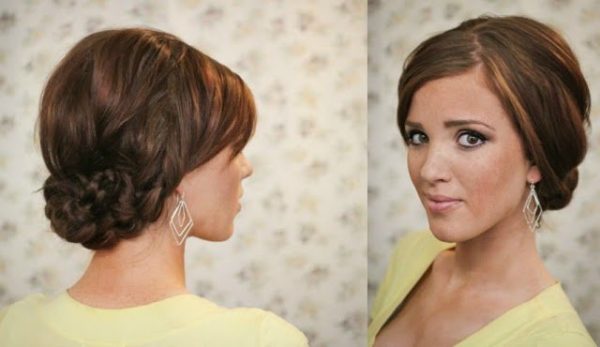
Step 4: In order to add a bit more volume and fullness to the look fluff your hair on your scalp. Then twist the leftover knotted hair back towards the other side of the head. Pin it on the top of the original knotted trail. Finish the hairstyle with a good spritz around the entire head. You are done! Enjoy your look!
