Do you have some special little girl in your life who is obsessed with Rapunzel’s braid hairstyle? Most little girls adore the spectacular long hairstyle in a braid that catches the floor that Rapunzel has. If you want to offer your little one the magic of this Disney princess, then do not miss watching the video tutorial below. The mothers from” What’s Up Moms” have found this super cool DIY Rapunzel braid hairstyle tutorial on YouTube. It will help you recreate the hilarious and eye-catching look of Rapunzel for the next birthday party of your little girl.
The most interesting part of this DIY project is that you won’t need any special materials at all. Not even some complicated DIY skills. Only love and dedication! Below, we are going to list all the needed basic crafting supplies for the project. Also, we will share with you a step-by-step guide on how to get the famous Rapunzel braid. Read the steps, and watch the video to see the steps that will get you to Disney’s princess hairstyle. In the video, you will explore some DIY princess crown ideas as well. Don’t miss it if you want to get completely inspired for the next princess’ birthday party for your beloved girl. Enjoy!
The supplies needed for the DIY Rapunzel braid:
- A large poster board
- Two large rolls of yarn
- Fabric scissors
- Three rolls of ribbon
- Three hair ties
- Hot glue and gun
- Toothpick
- Fabric glue
- Hydrangea blossom
- Two hair flowers

The step-by-step tutorial
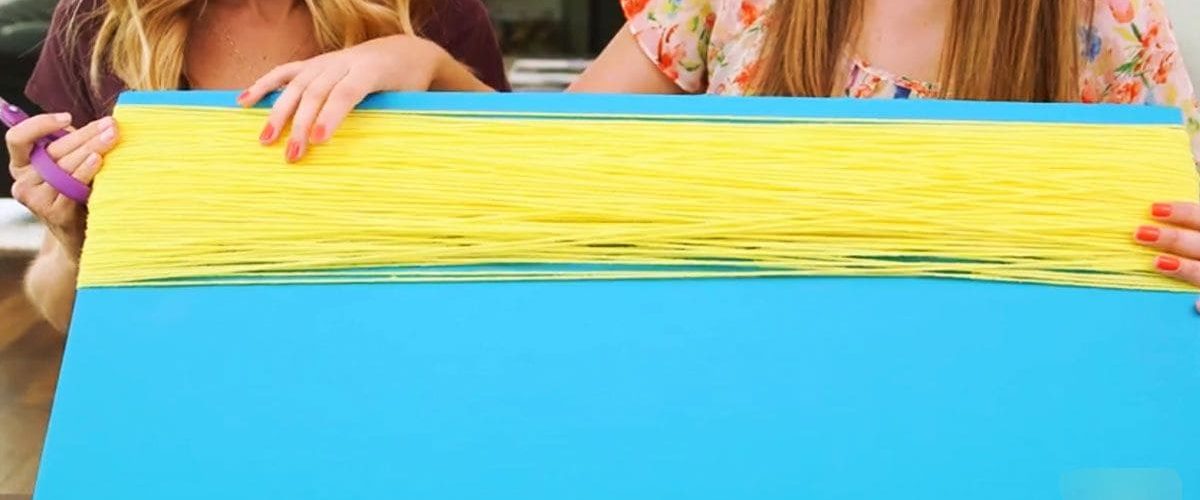
Step #1 Take the large poster board and two large rolls of yellow yarn. Roll the yarn around the width side of the posted board until you spent the entire amount of yarn. Once you are done, cut the yard on one side of the poster board using fabric scissors. Now you get a super large strand of yarn. Divide it into three yarn strands with about 52 strands in each.
Extra tip: The length of the strands will shorten as you braid them, so try to find a larger poster board. You would like the Rapunzel braid that you will put on the little girl’s head to touch the floor, so try to find a poster board that is at least the same width as the girl’s height. By rolling it you get double the width.
Step #2 roll out a length of ribbon across each of the three strands of the yard.
Step #3 Take some extra yarn (or a hair elastic), cut short lengths, and then tie them loosely around the groups of yarn. This will help you keep the strands from tangling while you will braid the Rapunzel Braid in the next step.
Step #4 gather the three groups of yarn strands into one at the end and then tie them together using a hair tie or hair elastic. Begin the braiding process the same way as you are braiding a regular hair braid. Do it as tight as you can. Also, make sure that the ribbons stay at the top of the strands so that they are visible when you put the Rapunzel braid in the girl’s hair later.
via WhatsUpMomsMore steps…
Step #5 When you get close to the end, tie the braid off with another hair tie so that you get one short and one long end.
Step #6 Use the hot glue to glue around both hair ties. Make sure the glue touches the yarn too, so the Rapunzel braid won’t slide off the hair.
Step #7 Measure the girls’ heads and using the measurements make a loop of the same size. Put the short end in the back. Now, tie it off and glue the bleep out of it again.
Step #8 Tie a ribbon around the area where you applied the glue to hide it. Make a bow. Insert the hair flowers to further hide the end of the Rapunzel braid under them. Tie a ribbon around the bottom end of the braid as well.
Step #9 In the end, use a little fabric glue and a toothpick to apply a line of glue along the clipped end of the ribbons so they do not fray.
Step #10 Clip the little flowers off the hydrangea stem. Take the hot glue and apply a few drops of it in a few different places along the length of the Rapunzel braid. Push the flowers into the braid on the areas that you glued before. Your braid will look simply adorable with this flower detailing.
Ending words
We hope that DIY step-by-step tutorial was helpful enough for you as well as the YouTube video itself. Do not miss trying it for your next kid’s party. You can include your little one in the project as well. Applying the flowers on the glued areas of the Rapunzel braid is a step that your kid can easily do. Enjoy the mom-and-daughter time together!