A pandemic as deadly as COVID-19 was not enough to stop the fashion fanatics from looking for something new. Hail the DIY tie-dye techniques. This nostalgic apparel has made a comeback, with searches increased by 4758% in the women’s tie-dye sweatpants section and 1072% in the sweatshirts department.

Here are some of the most popular tie-dye techniques that allow you to make mesmerizing patterns on just about any fabric. If you are a fashion zealot, then this article is a must-read. Don’t let being stuck at home hamper your style. You can find T-shirts perfect for Tie Dye at T-Shirt Express Ohio
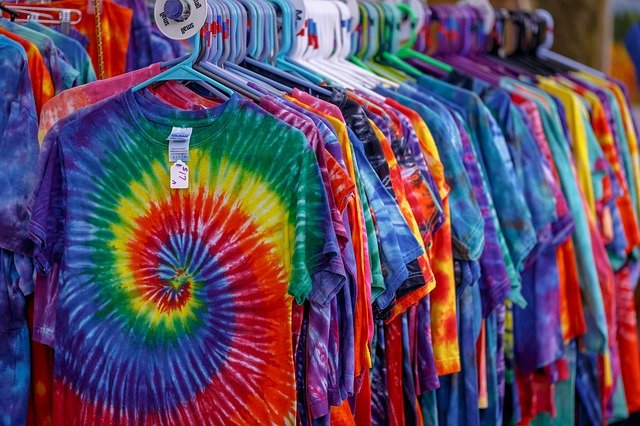
Swirl
Use a single color, or go wild with as many colors as you like. The technique is simple, and these are the steps to get a spiral pattern.
- Spread out the fabric that you need to dye,
- Pinch a small section in the middle of the fabric and then twist in one direction until the entire garment is rolled up like a cinnamon roll.
- Keep your hand in contact with the table to make sure that the fabric is flat.
- Secure the rolled-up fabric with elastic bands placed in a crisscross pattern.
- Remember, the tighter the elastic bands hold the garment, the more white areas.
- Here’s when the dye comes in. You can use a single color, two colors, or more.
- Apply colors on each wedge of the rolled fabric and let dry.
- Viola! You have a spiral that will spiral you right back into the fashion scene.
Scrunch
This is probably the most popular pattern in the art of tie-dye. Here is how you do it.
- Lay the garment flat and scrunch small sections of it until the entire garment is wrinkled into a tight ball.
- Secure the balled-up garment with several elastic bands.
- Follow steps 5 through 8 and get a scrunched look that is to die for.
- You can get creative when you splash color on the garment. You can randomly apply the colors to different sections of the cloth or follow a sequence of alternating colors.
Bull’s Eye
The easiest of all tie-dye techniques, the bull’s eye, gives you rings of color that erupt from the center and move outward. It’s child’s play for avid tie-dye artisans. Let’s get started.
- Lay the shirt flat on the table.
- Hold a small section of the shirt using thumb and forefinger, in the middle or where you want the bull’s eye to be.
- Make a cone shape and secure with elastics starting at an inch or two below the cone’s point and until the end.
- The gap between the elastics depends on how broad or narrow you want the rings to be.
- Follow steps 6 through 8 from the swirl technique.
Sun Burst
Give your clothes a burst of color with this DIY tie-dye technique. This is how you can get ready for the summer in no time.
- Spread out the garment flat on a table.
- Pinch small sections of the fabric and secure them with elastics. If you want the pattern’s center to be large, you can even place a small ball and secure the elastic.
- Dye the pinched fabric in one color and the rest of the material in another.
- Another way to do this is to get a single burst of color by having only one center and then placing a couple of more elastics below it to give it a multi-color look.
- Color each section with a different color. It is recommended to use complementing palates to give a coordinated appearance.
Stripes
They can be horizontal, vertical, or diagonal. Stripes are always trendy, and no matter which direction they flow, the fashion quotient is always up. The best time to don stripes is “every time.” This is how you do it.
- Pleat the fabric horizontally, vertically, or diagonally.
- Secure the pleated fabric giving an inch or two gaps between elastics.
- Color each section with the desired color.
Shibori Boxes
A Japanese twist to Chinese art. Shibori box patterns appear intricate but are easy to make. You can make any size boxes depending on the size of your garment.
- Layout the garment on a flat table.
- Pleat the fabric horizontally to make one long swath.
- Now comes the twist. Fold the cloth vertically to make boxes. The size of the boxes is up to you.
- Secure tightly with 3-4 elastics to make sure it does not come to lose.
- Color with a single color.
- Once dried, you will get white boxes with the colored grid.
- You can take a colored shirt and follow the same technique if you don’t want any white. The result will be the base color boxes with the dyed color grid.
Tie-dye techniques are easy to do and give you a highly fashionable appeal. There are several other methods out there. The method is not limited to shirts only, and you can use it to add color to your sweat pants, skirts, bikini, and swimwear, and even color children’s clothes with these fabulous patterns.