Hello DIY lovers! Are you ready for some new and inspiring DIY ideas? If yes, then you will adore the following 5-minutes DIY projects that we have prepared for you. We know that in the busy everyday life we all live, there is not much free time for DIY projects, But these 5-minutes DIY projects are something you must try. They won’t take you more than five minutes, and the best is that most of them won’t take you not even five dollars. So, time to start the adventure! Scroll down the page and enjoy!
1. DIY – Convertible Necklace Headband
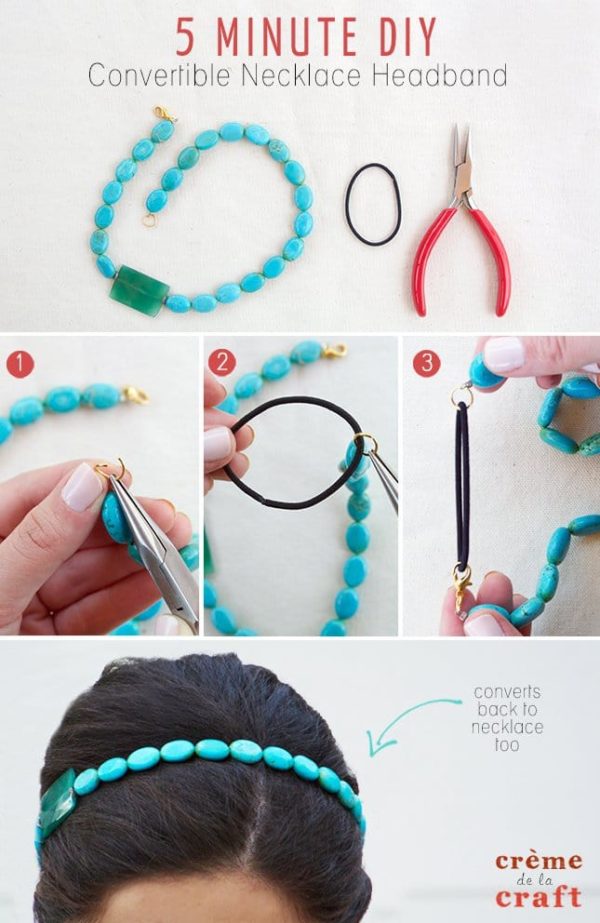
If you have a few minutes in the day (and we all do!), then you should definitely try this 5-minutes DIY project. For it, you will need only three supplies. Instantly, from a necklace, you can create a stretchy elastic hair tie. Here are the supplies you need to transform the necklace into a hair accessory:
- Necklace or chain
- Elastic hair tie
- Needle nose pliers
The steps:
- Take the nose pliers and pend open one of the jump rings or links at the end of the necklace or the chain. If your necklace does not have links then you are one step closer to the DIY project finish. All you need to do is easily open the end of the necklace.
- No, insert the elastic hair tie into the ring and close it back with pliers.
- On the other end of the necklace, open the lobster clasp and then insert the elastic tie inside it.
- Try it on your head. If it fits properly, then your DIY project is done! Enjoy styling different hairstyles with it.
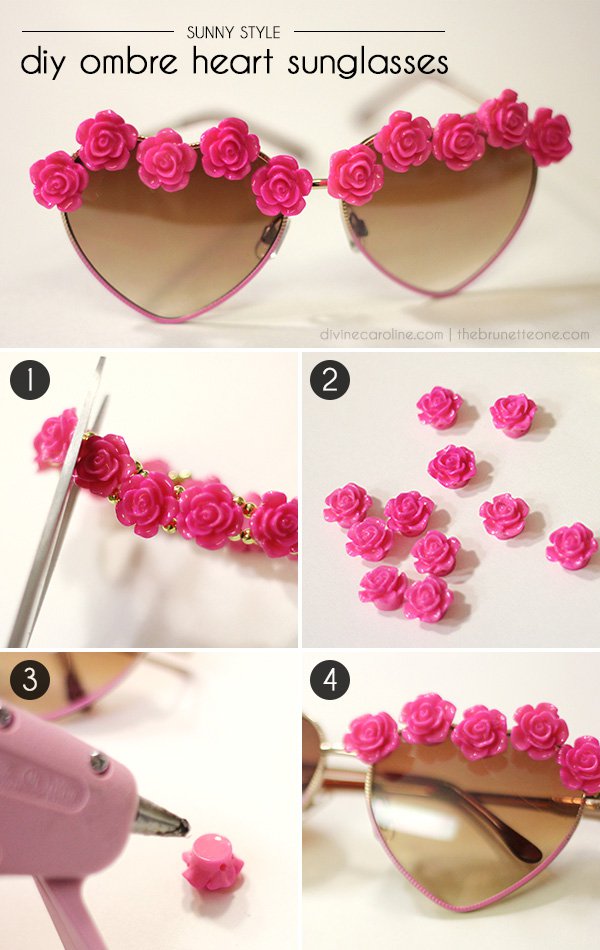
2. Sunny Style! DIY Embellished Sunglasses
3. DIY tic tac bobby pin case
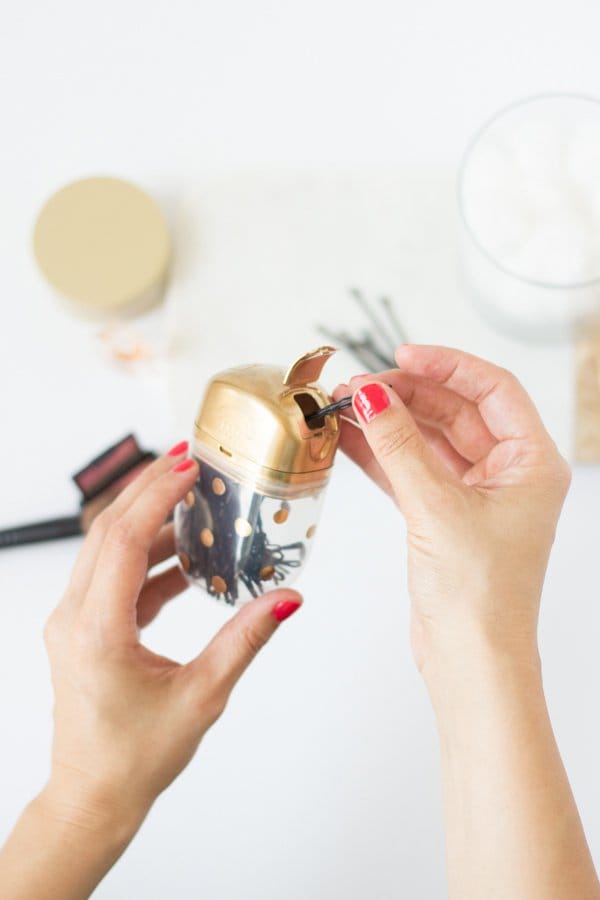
Missing bobby pins are nothing new. You can never find them when needed. So, in order to solve this problem forever, and keep all your bobby pins together, here is an idea. This is one of those 5-minutes projects that you will certainly adore, because it will take you less than 5 minutes, no money at all, and will keep your bobby pins on hand.
Here are the materials that you will need for your project:
- Tic Tac case
- Gold spray paint (or gold nail polish)
- Gold craft paint or liquid gilding
- Wooden dowel
- Bobby pins
The steps:
- First, enjoy those delicious Tic Tacs. Once the container is empty, time to start the project!
- On the bottom of the pack, use the end of the dowel to dip in the gold paint. Gently apply the polka dots to create an eye-catching pattern. Or, you can use the nail polish brush to apply the dots. This is the easier variant of the project. And the one that will require less time for drying.
- Once everything is dry enough, time to store the bobby pins in the new DIY bobby pins box. There is nothing easier than this project, is there? And, the best is that you can wear your bobby pins box in your bag or purse as well. It is small and won’t take up a lot of space, and will keep all your bobby pins on hand once you step outside the house.
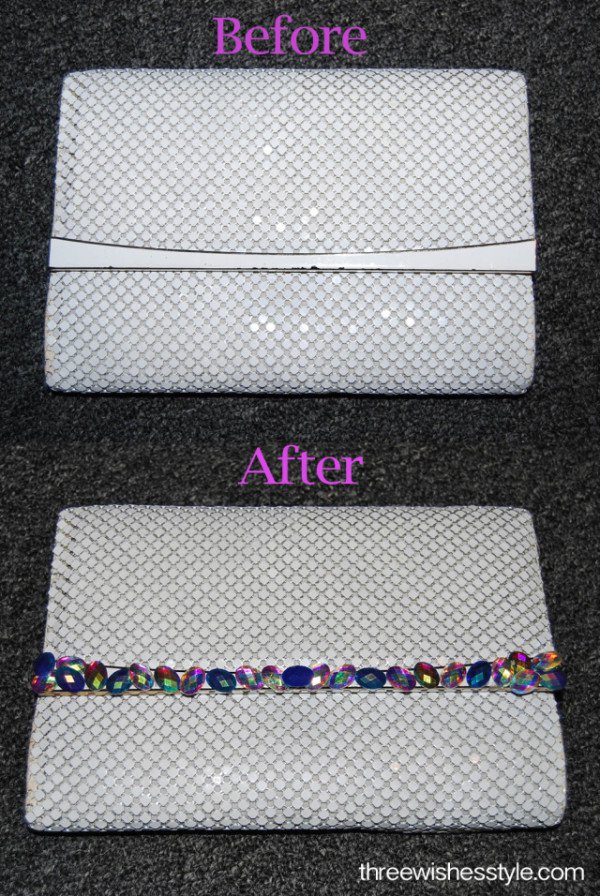
4. DIY: Jeweled Shoe Clips
Are you ready for some shoe makeover this summer? If you do have not too much time disposable to spend on DIY projects, but still love to remake your old boring shoes, you are in the right place. Here we are sharing with you some 5-minutes DIY projects that you must try. One of them is the following one, showing how to makeover your summer shoes in only a few simple steps.
The supplies:
- Wire supplies
- Brooches in pairs of two
- Glue
- 4 earring clip-on backs
Instructions:
- First, take the wire cutters, and completely snip off the entire pin back.
- Now add glue to the earring backings and stick it to each of the brooches. Hold for a moment.
- Now, apply glue to the shoe in the place where you want to attach the brooch.
- Place the brooch onto it and hold it for a moment.
- Let dry overnight.
- In the morning, you can already wear your new and decorated shoes!
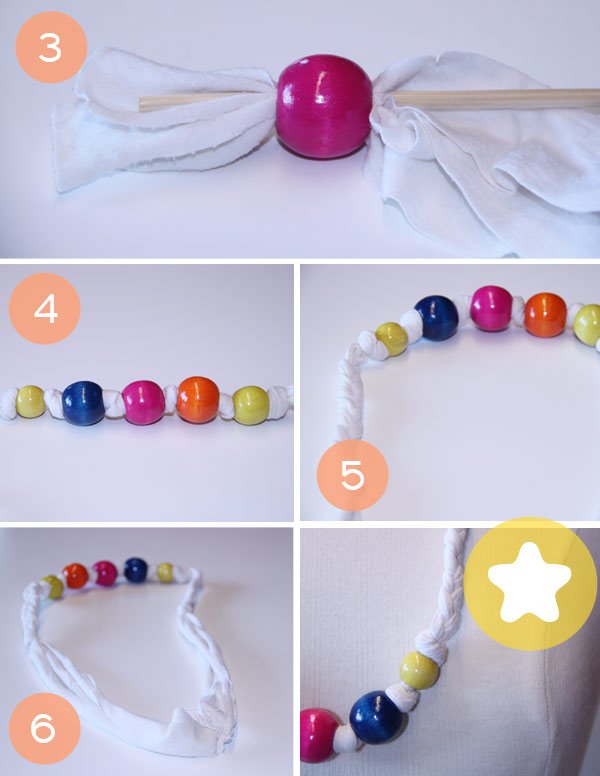
5. This quick and simple DIY necklace is the perfect project to do with kids!
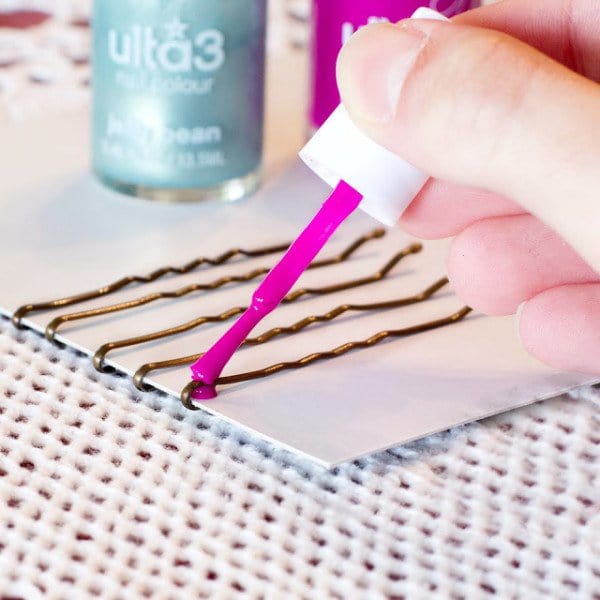
6. DIY Painted Bobby Pins
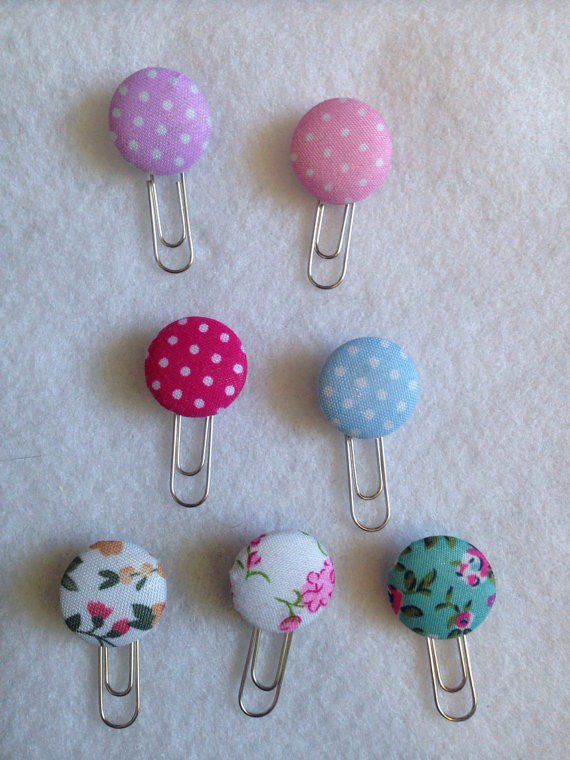
7. DIY “vintage” button bookmarks
This is one of those 5-minutes DIY projects that book lovers will simply adore. If you have some old buttons that you don’t use, then here is a perfect way to put them to use right now. For your DIY button bookmarks you will need the following supplies:
- Buttons
- Wire cutters or industrial scissors
- Paper clips or pre-backed clips
- Glue
Here come the steps:
- First, take the wire cutters to clip off the hook of each of the button’s backs.
- Now, squeeze a small drop of glue on the flat side of the paper clip.
- Stick it on the flat side of the button that you just created.
- Done! Time to read and mark the pages! Enjoy both the project and the reading!

