Hello ladies! Are you ready for some quick and easy DIY hairstyles? If yes, keep scrolling down the page to explore some of the easiest DIY hairstyles ever. In the article below, we have made a selection of some quick and easy DIY hairstyles that you must try. Enjoy!
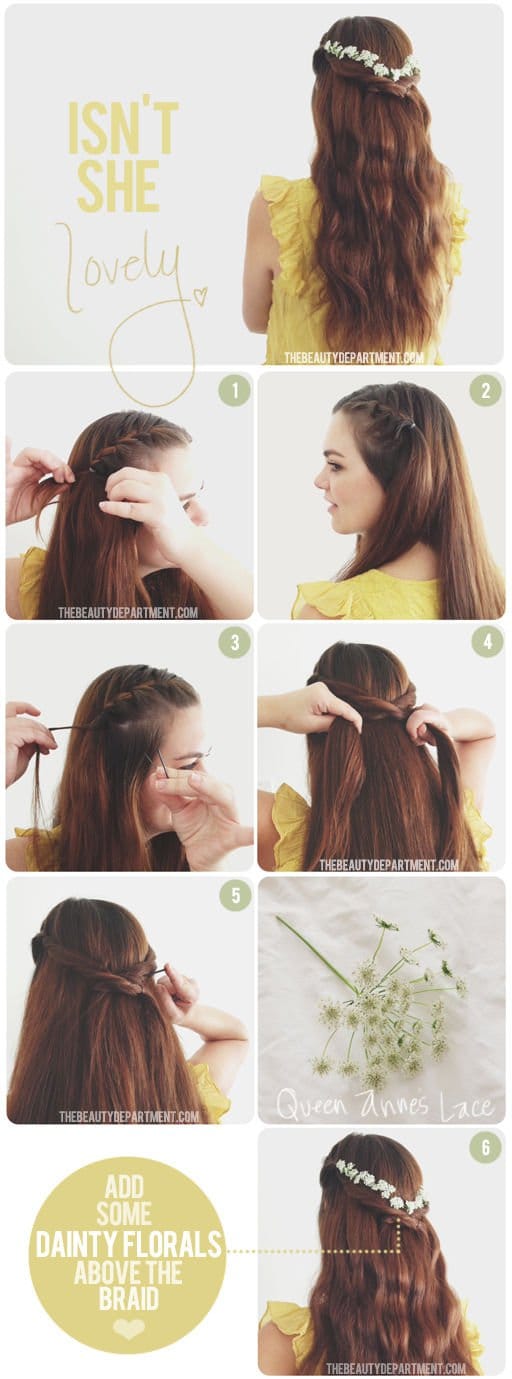
1. Wedding Hairstyle idea
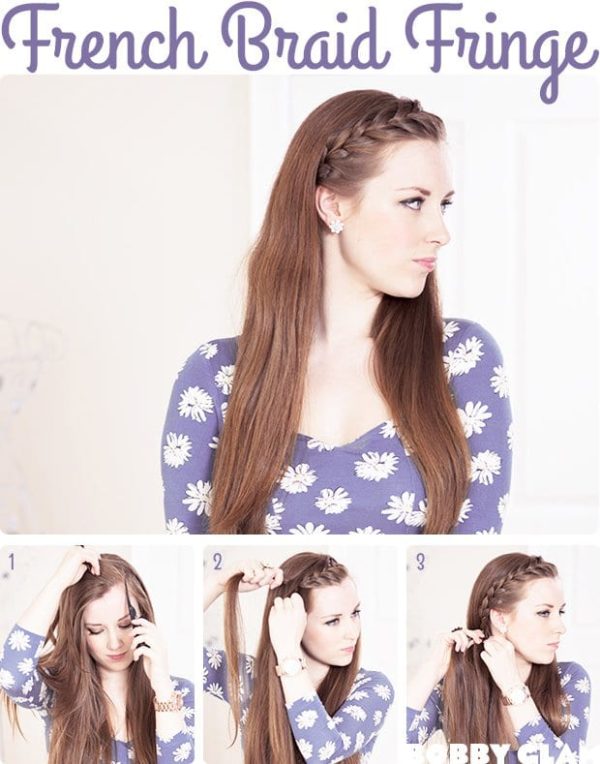
2. French braided bangs
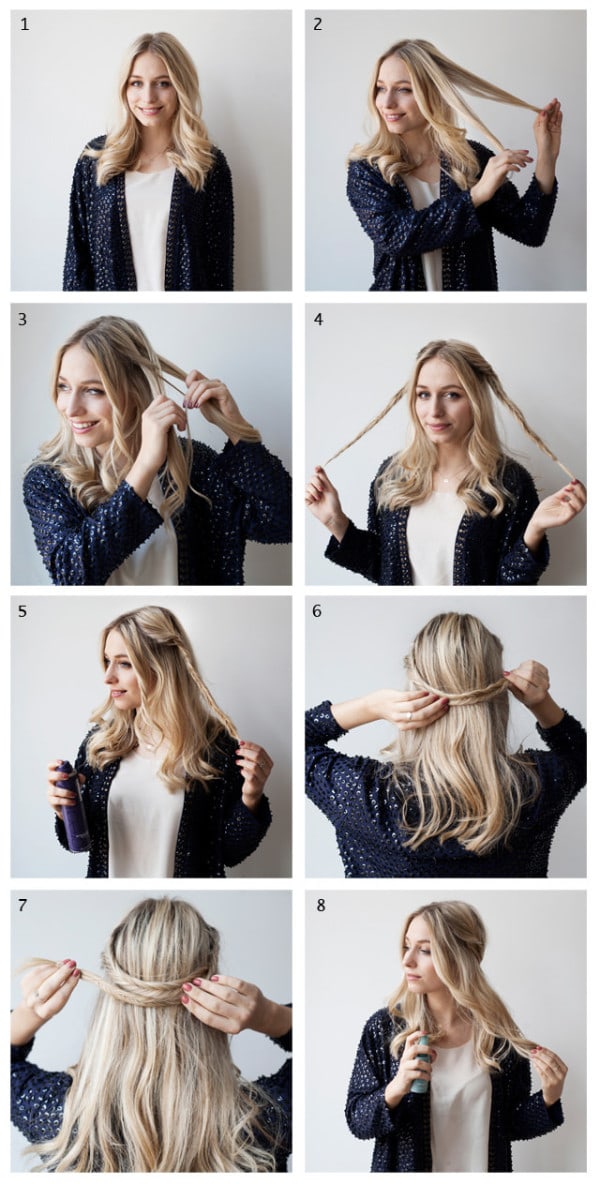
3. How to: wrap-around braid
 source
4. Fishtail braided headband
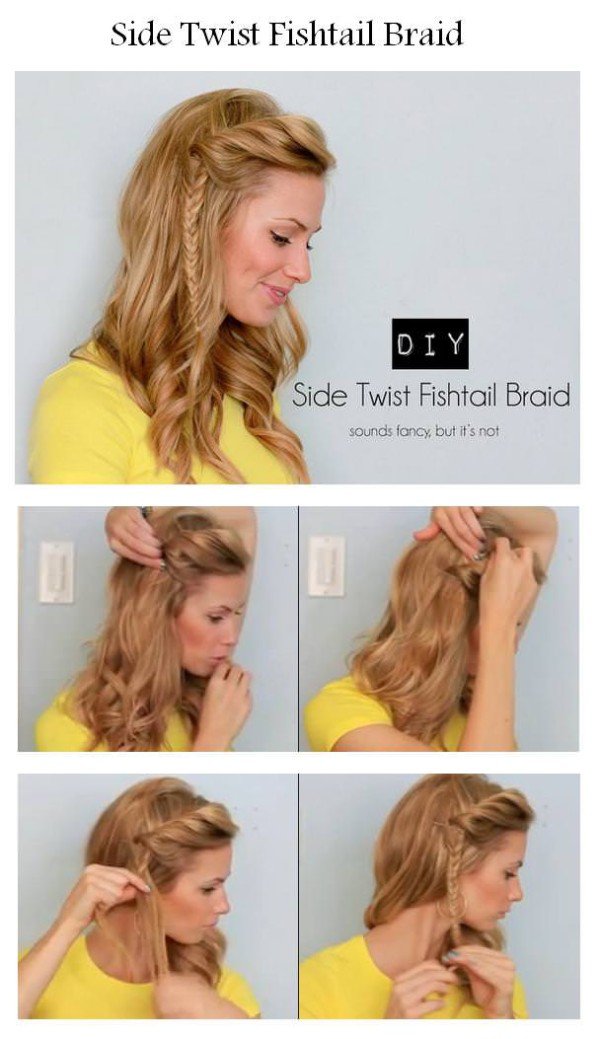
5. DIY side twist fishtail braid
6. How to Create the Easiest Braided Hairstyle Ever
Do you want to save time in the morning when getting ready for work? Then you must try the easiest braided hairstyle ever. Below we have selected for you this quick and easy DIY hairstyle that will keep your hair looking perfect the entire day. The time spent on making it is less than 5 minutes. Here are the steps:
- First, starting two inches back from the hemline, grab a section of hair that is four inches wide. Separate this section from the rest of your hair.
- Second, begin to braid each section of hair at an angle so that you can easily wrap it around your head without any bumps left.
- Take a bobby pin and use it to secure the braid to the rest of the hair.
- Repeat the same steps with the other side of your head.
Voila, you are done!
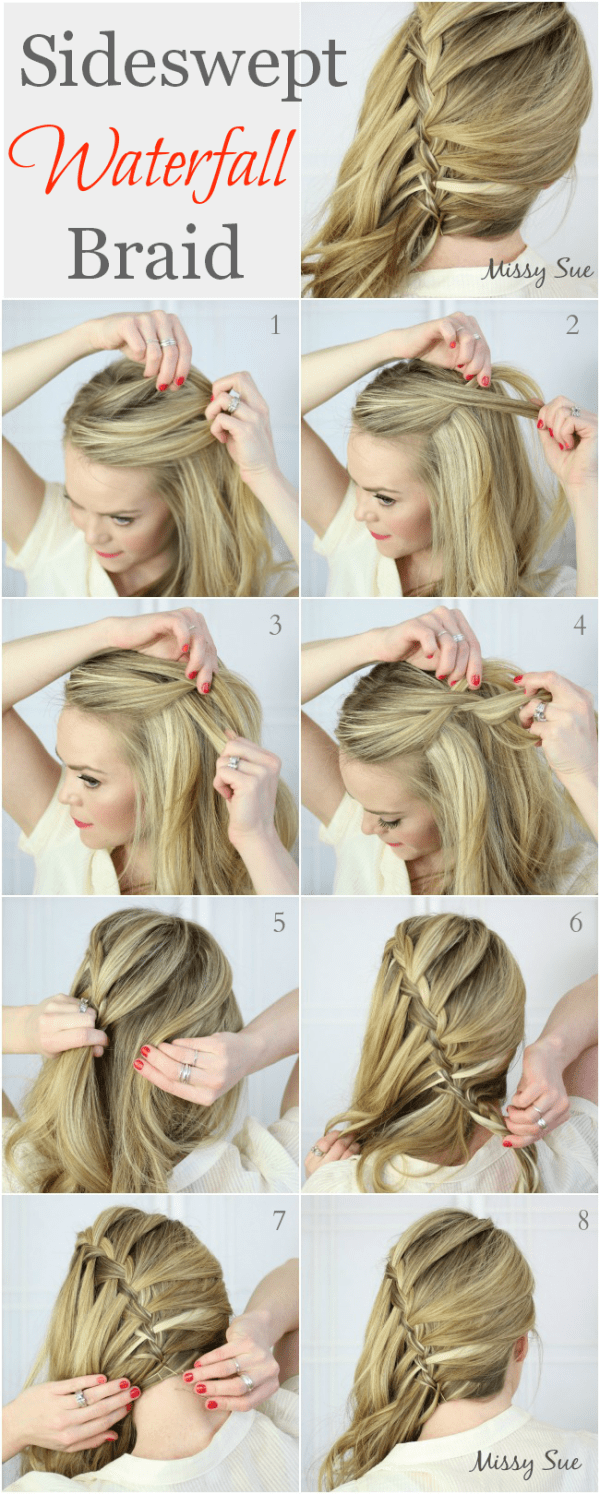
7. Braid 11-side-swept waterfall braid
 source
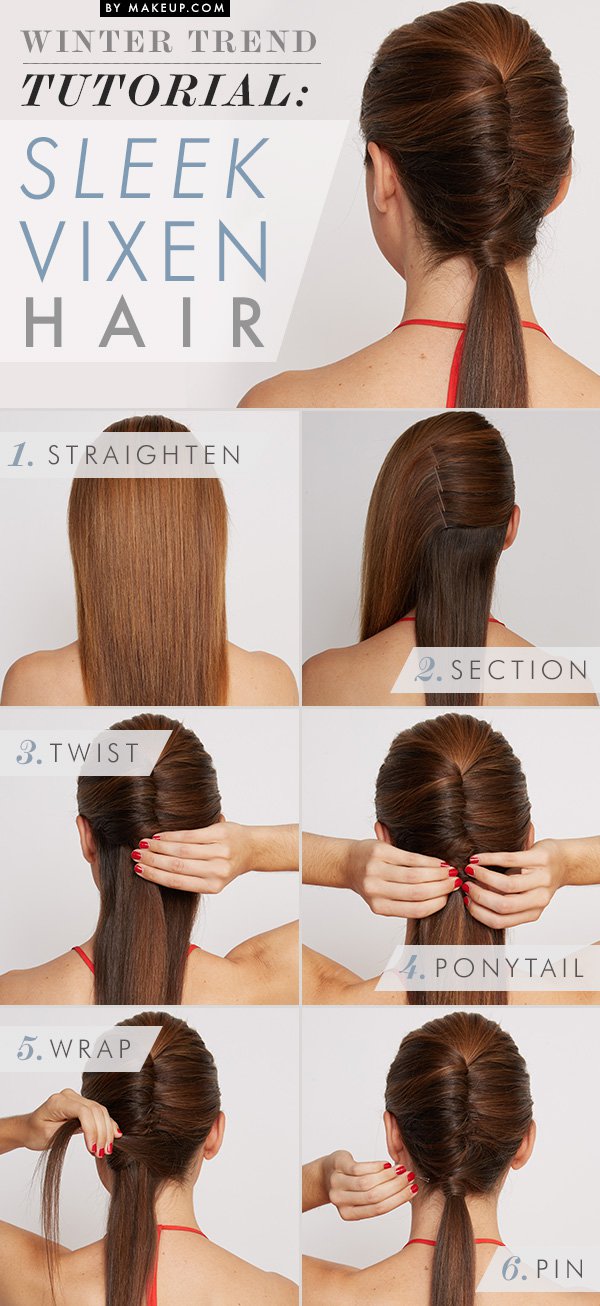
8. Get the Look: Sleek Vixen Hair
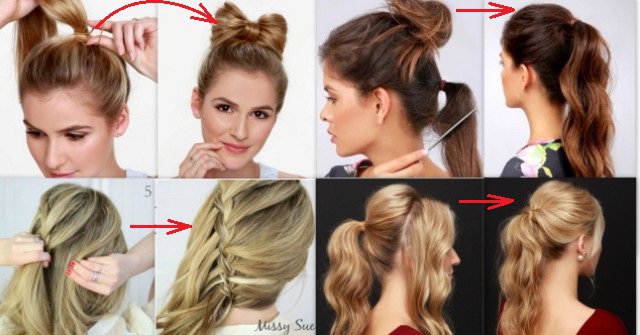
9. How-To: Hair Bow Tutorial
If you enjoy quick and easy DIY hairstyles, you will definitely enjoy this adorable bow hairstyle. It is the perfect hairstyle to do for special occasions as well as for casual “every day at work” looks. Here are the steps to follow:
- First, brush your hair so that you remove any knots or tangles.
- Then, pull your hair into a high, looped bun on the top of your head. Wrap a hair tie around the ponytail to keep it secure.
- Split the bun you’ve created so that you get 2 loops out of it. Divide the hair in the middle of the bun to create two equal halves. Pull each of the halves to the right and the left side of the head.
- Pull the rest of the ponytail lover the center of the bow. Gather it as smoothly as possible. You can use some hairspray to get better and smoother results as well.
- Pull the ponytail up and over the top of the bow ad position the ponytail between the 2 loops.
- Divide the ponytail in half and pull each strand under each loop (slide the left strand under the left bow loop and the right strand under the right ow loop).
- Secure the ponytail strands using bobby pins.
- Roll and tuck the ponytail strands into the bow loops to hide the strands and to poof out the bow.
- Set the bow using as many bobby pins as needed. Finish the look with hairspray.
Voila, your DIY bow hairstyle is done!
10. How-To: Braided Crown Hair Tutorial
11. How-To: Party Perfect Ponytail Hair Tutorial
Are you in a rush anytime you need to go out with friends? If you want some quick and easy DIY hairstyles that will help you look amazing for your next party out with friends, then here is a super easy one to try. Below are the steps to copy:
- First, section the front of your hair starting at the ears area.
- Pull the rest of your hair into a mid-height ponytail.
- Using the comb, tease the front of your hair. Sweep it away from the face. Secure this section to the rest of the ponytail with a bungee ponytail holder.
- Take the iron curler and curl the ponytail in sections.
- Use your fingers to comb through the curls.
- Take the comb again and tease at the base of the ponytail in sections. This will add fullness to your ponytail.
- Wrap a section of hair around the ponytail holder to hide it and secure the strand of hair using a bobby pin.
Voila, your hairstyle is finished and ready to party on!
12. How-To: Twisted Bun Hair Tutorial
13. Longer & Thicker Ponytail
Here is another from the edition of quick and easy DIY hairstyles that you must definitely try. If you have always loved a messy and voluminous ponytail, we are having a step-by-step tutorial for you. Here are the steps to follow:
- First, pull the top half of your hair into a bun.
- Fasten the remaining hair into a second ponytail.
- Take the comb and use it to backcomb the lower ponytail to add fullness to it.
- Create the top ponytail.
- Carefully smooth the top of both ponytails to blend.
- Using the comb again, gather all the hair from both ponytails. Texturize them with the help of the comb.
- Finally, finish the look using hairspray.
You will adore this longer and fuller ponytail to the maximum.

