Hello creative moms! Are you in for some inspiring and super adorable kids’ DIY clothing projects? If yes, let the adventure begin! In this article, we are going to share with you some easy-to-do kids’ DIY clothing projects that you can copy and make some adorable kids’ clothes. There is nothing as pleasant as creating clothes for your little ones, so we are sure you will enjoy this DIY adventure. Here we go:
1. The Wool Coat
2. Make kids skirt from T-shirt
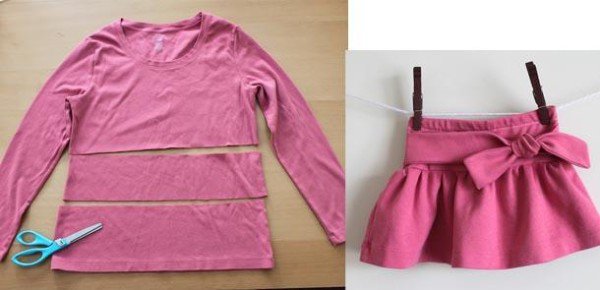
If you have some old kids’ t-shirts that your kid does not wear anymore, here is a kid’ DIY clothing project to try. To make a girl’s skirt out of an old t-shirt you will need the following supplies:
- A jersey knit shirt
- Matching thread
- Needle
- ½ inch width elastic
The instructions:
- First, cut the shirt into three pieces as shown in the picture. Use the bottom of the t-shirt for the top of the skirt. This will save you hemming time.
- Once you have the pieces, take the top one and cut two pieces out of it. The pieces should be in different lengths. Take the two pieces you cut from the top and fold them in half lengthwise. Iron it wrong side out. Sew one short and the long side. Then sew each of the pieces to each of the edges of the second top piece.
- Allow space for the elastic in the piece on the top part of the skirt.
- Match the bottom piece of the skirt to the top piece you already made. Sew the pieces together.
- Iron well. Voila, your kid already has a new skirt for stylish summer outfits!
3. From Men’s Pajamas To Girl’s Dress
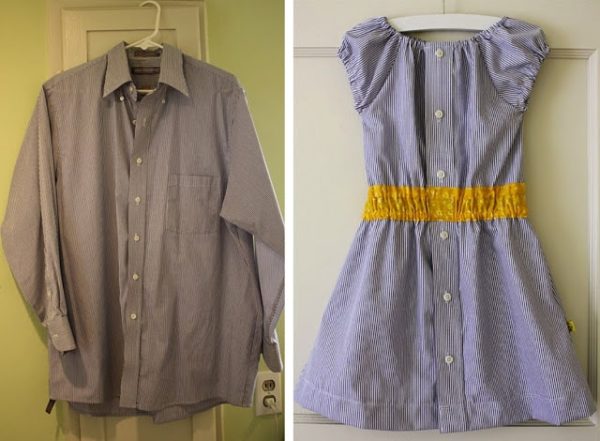
4. Men’s Dress Shirt into a Girl’s Dress
5. Kids Sweater dress from Adult Sweater
Looking for another kids’ DIY clothing project that includes upcycling old clothes? Here it is! For this project, you will need an old sweater and a needle and thread. And your creativity!
The instructions:
- First, cut off the sleeves and some of the sides into an A-line shape. You can create a little curve at the area where you will attach the sleeves of the dress.
- Then sew the sides of the dress together with the wrong side out.
- Use the old sleeves to cut off the sleeves for the dress. You should use the curve line you created on the body of the dress as a pattern for cutting the line of the sleeves where they would be attached to the main body.
- Sew the sleeves to the main part of the dress wrong side out.
- Once you have attached the sleeves to the dress, turn the dress right side out.
- You can embellish the dress with whatever embellishments you like or you can keep it simple as it already is.
- Voila, you are done!
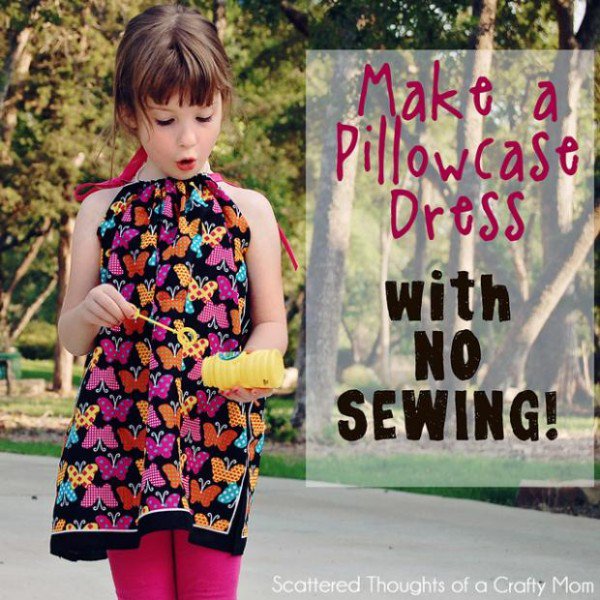
6. No Sew Bandana Dress
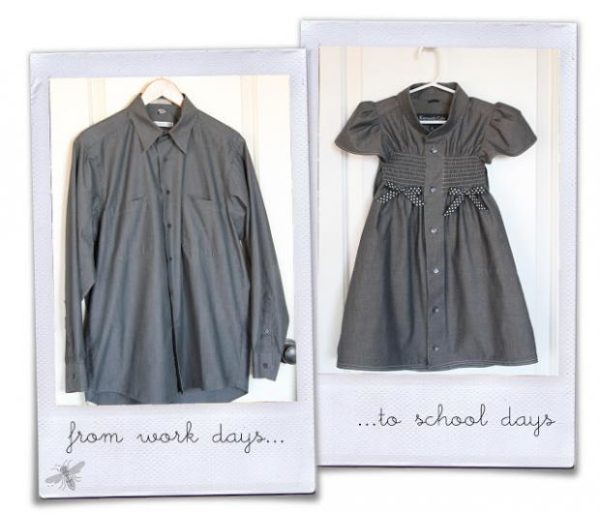
7. Make a Dress for your girl from Dad’s unused shirt!
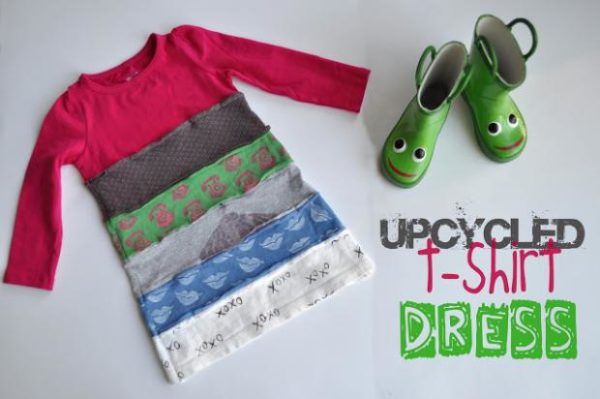
8. Upcycled T-shirt Dress
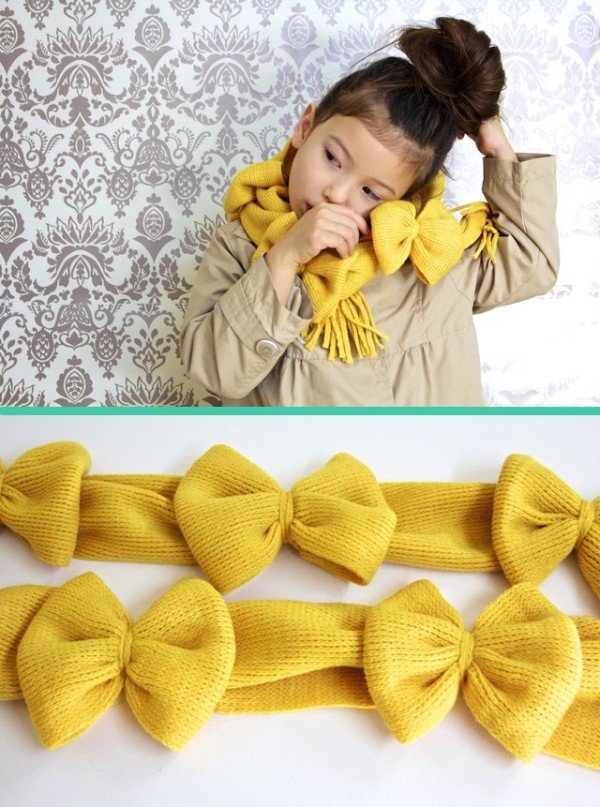
9. DIY bow scarf tutorial
Are you searching for some inspiring DIY winter accessories projects for kids? This ribbon-detailed scarf is a perfect kid’s DIY clothing project that you can try this winter. For this project, you will need two same little scarves. The instructions are so easy to do and the project won’t take you more than 10 minutes. Here we go with the steps.
The instructions:
- Sew the two scarves together creating one long. Trim the tassels from the ends that you are sewing together.
- Make approximately six pleats by sewing the scarf as presented in the tutorial. This way you will create loops in six places on the scarf.
- Flatten the loops and tie a ribbon or string around the middle. You can use yarn to tie for a more fashionable and stylish look.
- Voila, your ribbon scarf is done!
10. DIY winter cape
11. Cute winter hats
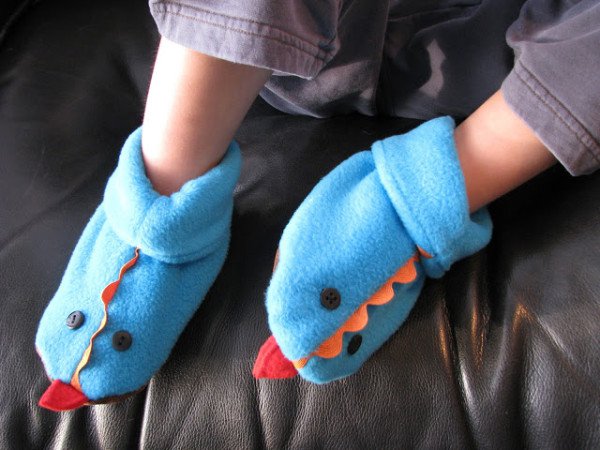
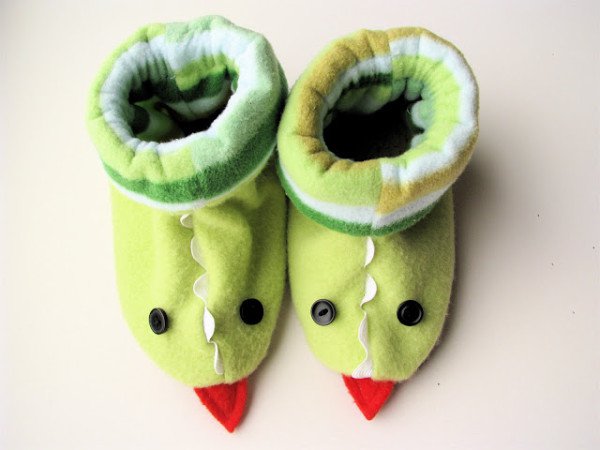
12. Winter Accessories
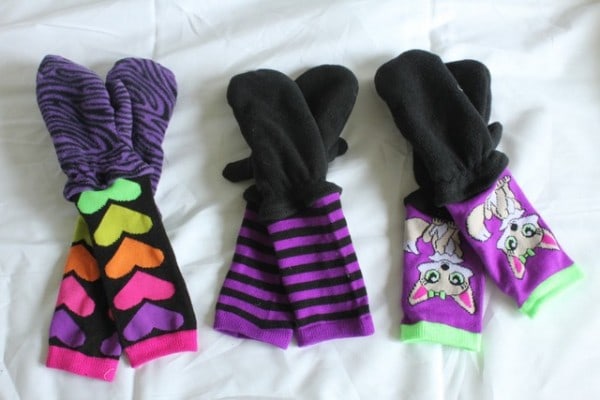
13. DIY long gloves
14. DIY no slip socks
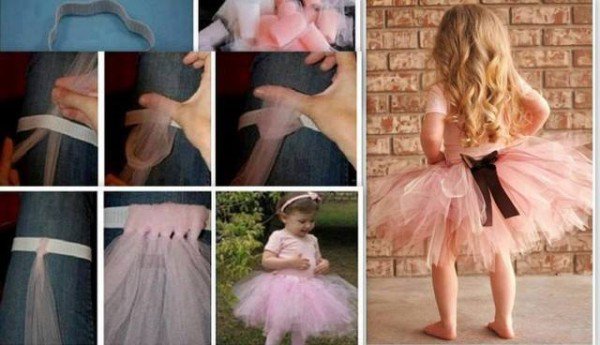
15. DIY Tulle Skirt
This is probably the most inspiring kids’ DIY clothing project ever. Your little girl will simply adore this fluffy tulle skirt and you will enjoy seeing her wearing something you made on your own. For this project, you will need a piece of tulle fabric and wider elastic.
The instructions:
- First, decide how long you want the tutu skirt to be. Then multiply the desired length by 2. This is the length of any tulle stripe you need to cut.
- Cut the tulle piece according to this length and then fold the resulting piece in half.
- Decide how wide you want any of the stripes to be. Then take the scissors and start cutting the tulle stripes. You can create as tulle stripes as you want. If you want a more voluminous skirt then you should cut more stripes.
- Prepare the elastic waistband. Cut a piece of wide elastic according to the needed measurements of your girl’s waist. Then sew both ends together using a needle and thread.
- Put the elastic around your leg so you can easier tie the tulle strips around it. Start tying each of the tulle strips around the elastic until you have covered the entire elastic.
- Once you are done using your fingers to comb the stripes from the waist to the hem.
- Your princess tulle skirt is done!

