Hello DIY lovers? Are you ready for some inspiring DIY fashion projects? In the article below, we are going to share with you some of the easiest DIY fashion projects ever. If you were searching for some creative ways to transform or repurpose your old clothes, here they are. All you need to do is to follow the step-by-step tutorials below. In less than an hour, you can have completely new pieces of clothes in your wardrobe. Are you in? Here we go with the DIY fashion projects tutorials.
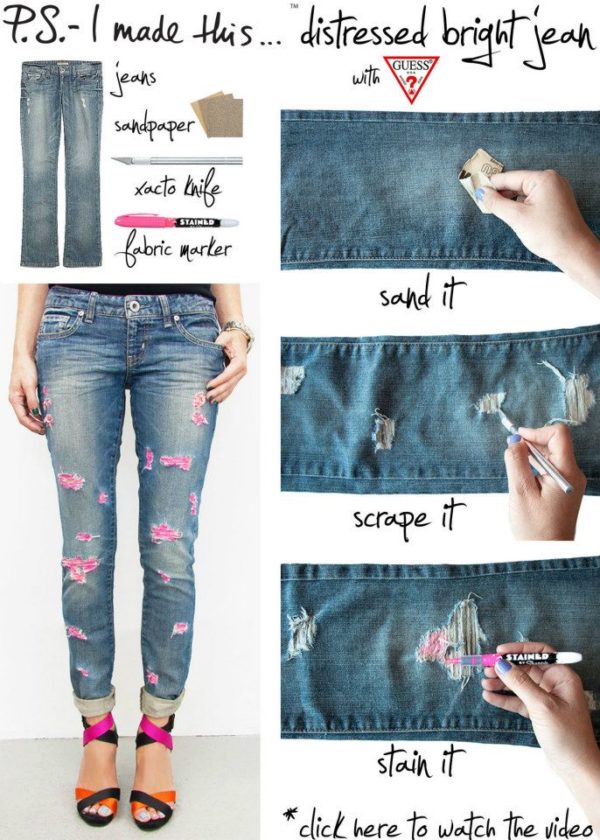
1. Diy Distressed Bright Jeans
2. Zipper Neck – T-shirt Recycle
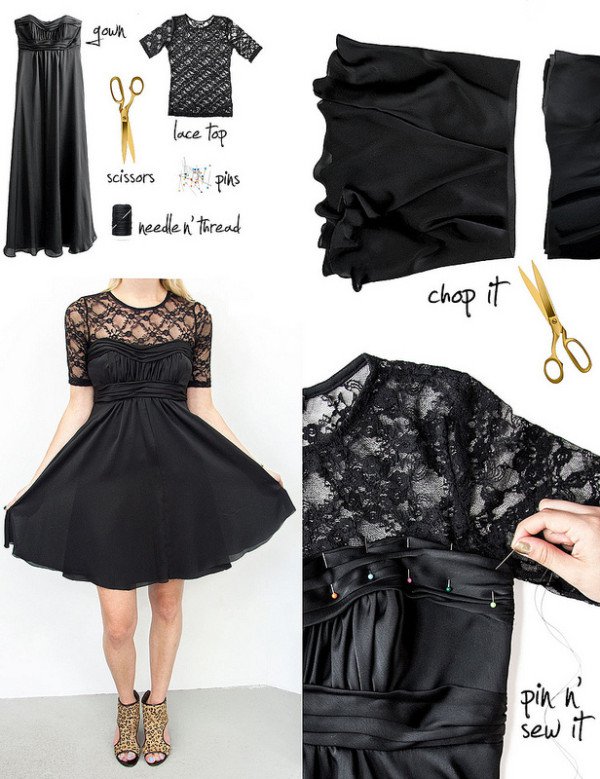
3. DIY Lace Dress
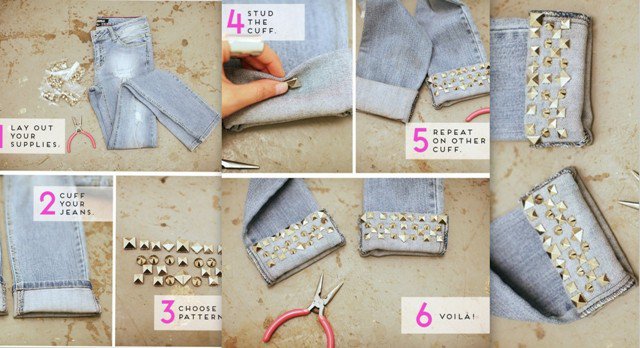
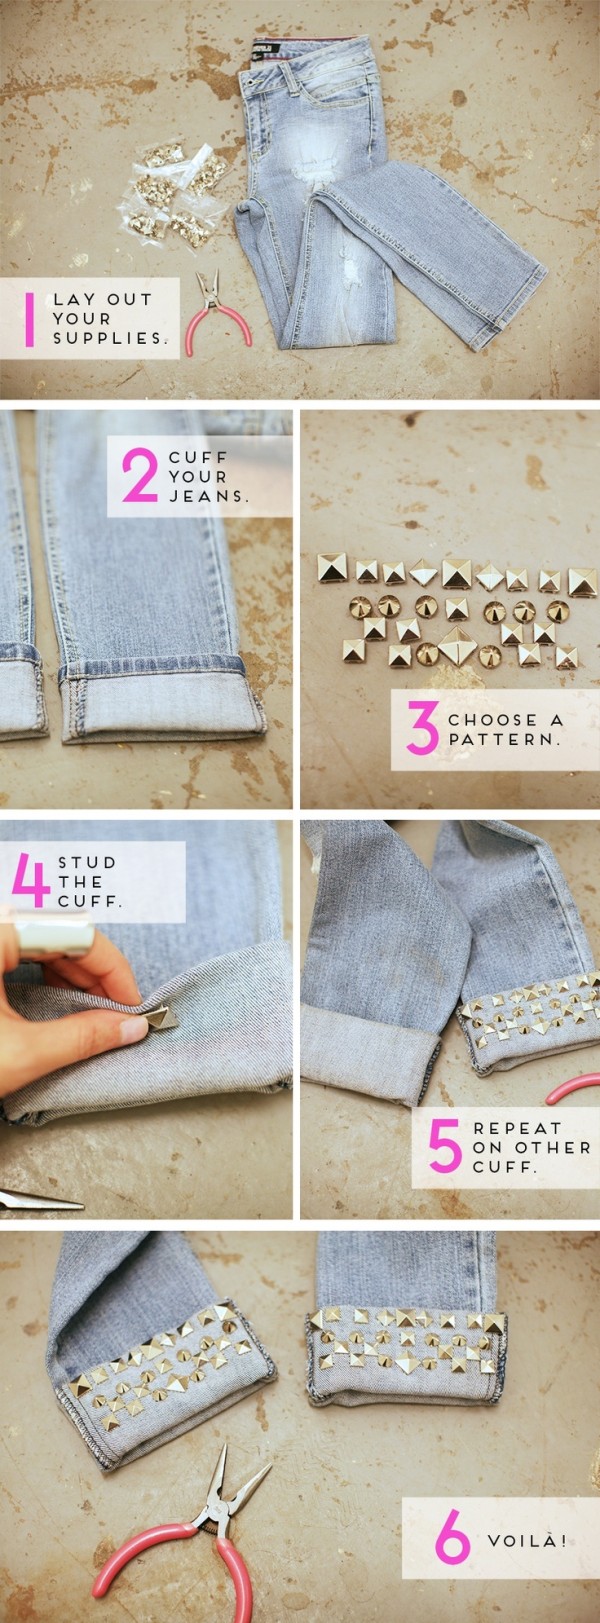
4. DIY: Studded jeans
5. DIY – Square circle skirt
Are you searching for some inspiring DIY fashion projects for kids? Here is how to get the easiest DIY girl’s skirt ever.
- First, using some circle object (a bowl for example) with a diameter that is the perfect size for you, or a little bigger, cut a perfect square from the center of the fabric.
- Take some wide elastic.
- Place pins on the bottom of your elastic band at the sides and the exact middle in the front and back.
- Match up the pins of the elastic and the skirt, overlapping the fabric by about a half-inch to the underside of the elastic.
- Using some basic sewing skills, sew all the way around the elastic, attaching the skirt right to it.
- Use a zig-zag stitch so that the elastic can still be free to stretch.
- Voila, your kid’s skirt is done!
6. DIY Jeans Lace
7. Polka Dot Shirt
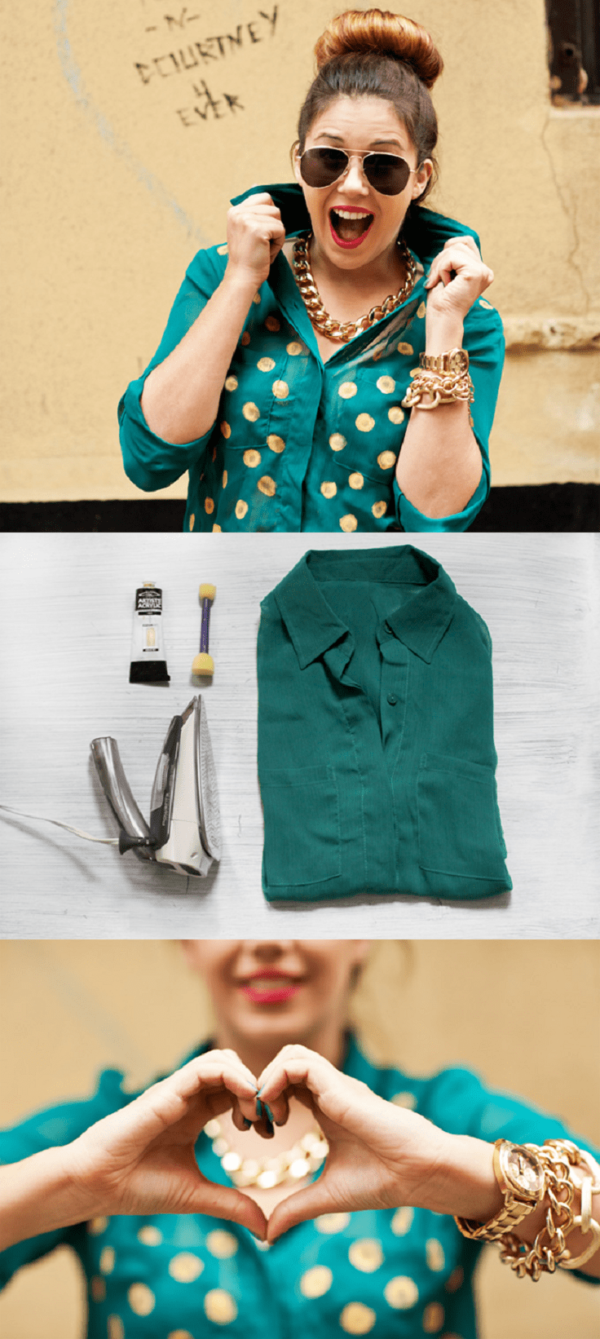
If you want to try some easy DIY fashion projects, then you shouldn’t miss the following one. This is probably the easiest way to transform an old white plain-colored shirt into some funny one. Here is all you need to do:
- Take a white or plain-colored shirt.
- With a circle sponge, dot on circles over the front of the shirt using fabric paint.
- Let it dry and then set it with an iron. You are already done!
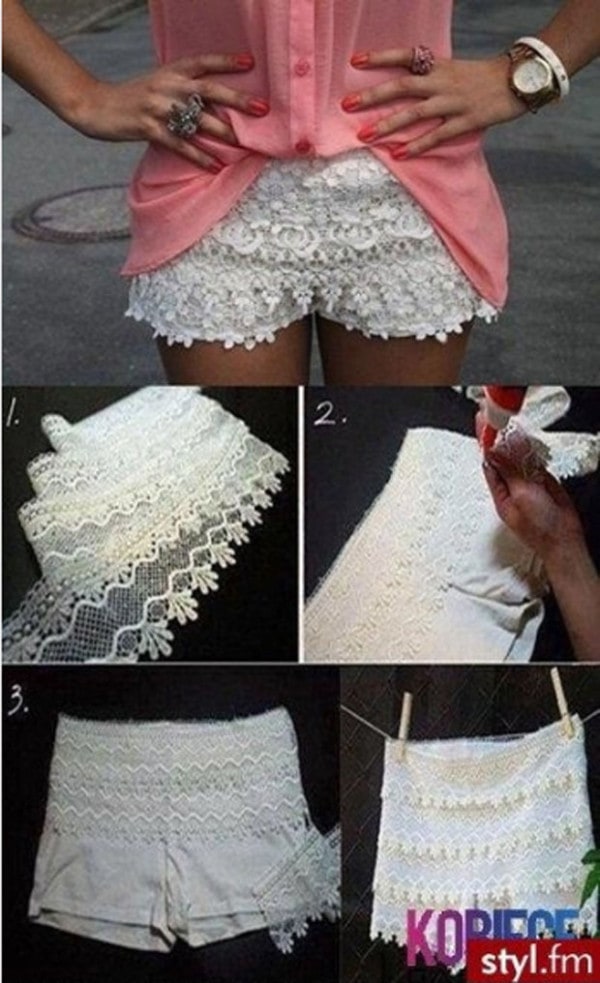
8. DIY Lace Shorts
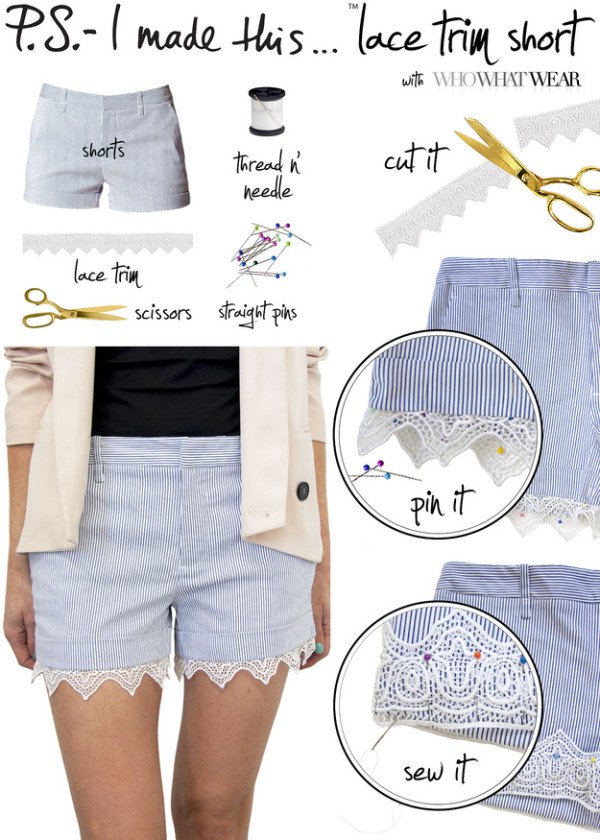
Do you want some inspiring DIY fashion projects for summer? Here we present you one interesting way to transform some old and boring shorts into some flirting ones. All you need to do is to follow the steps presented below:
- Take some old shorts and lace.
- Wrap some of the lace around the cop of the shorts in order to find the needed amount of lace for the project and cut it.
- Put glue around the top of the lace carefully, little by little as you go around the line. Press the lace down onto the material.
- Take the next strip and repeat the same with the rest of the lace on the second strip (lower than the first one).
- When you get towards the bottom where the shorts split, wrap the lace around each leg hole particularly.
- Hand the short in order to dry.
Extra tip: If you have even some basic sewing skills you can sew instead of using glue. It is totally up to you which way you choose.
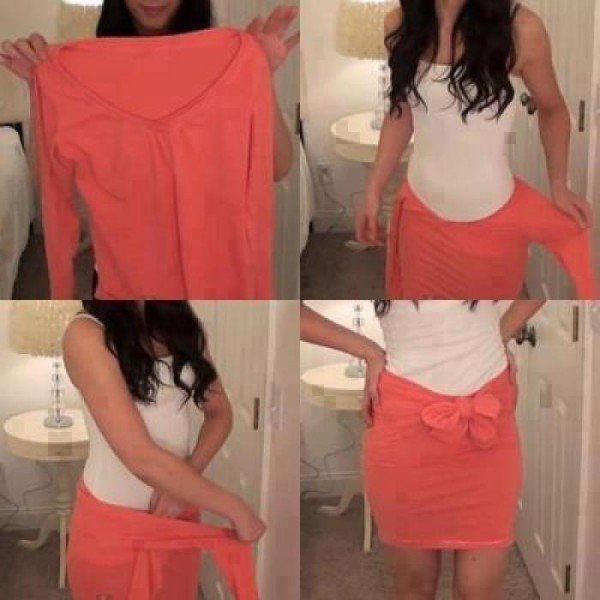
9. From Shirt to Skirt
10. DIY Convertible Shawl/Shrug
11. DIY Pearl Collar
Don’t miss one of the easiest DIY fashion projects to embellish your shirt collar with pearls ever. All you need for the project is a shirt you want to embellish, pearl beads, thread, needle, and scissors.
- First, place some of the pearls on your shirt in order to find the best way you want to arrange them.
- Start with the tip of the collar and begin sewing on the beads.
Extra tip: Sew the beads onto just the top fabric layer of the collar, so no threads will show on the underside.
- Continue sewing the pearl beads until you finish one side of the collar.
- Repeat the same with the other side of the collar. You are done. Your simple shirt will look so adorable now.
12. DIY Heart Patterned Jeans
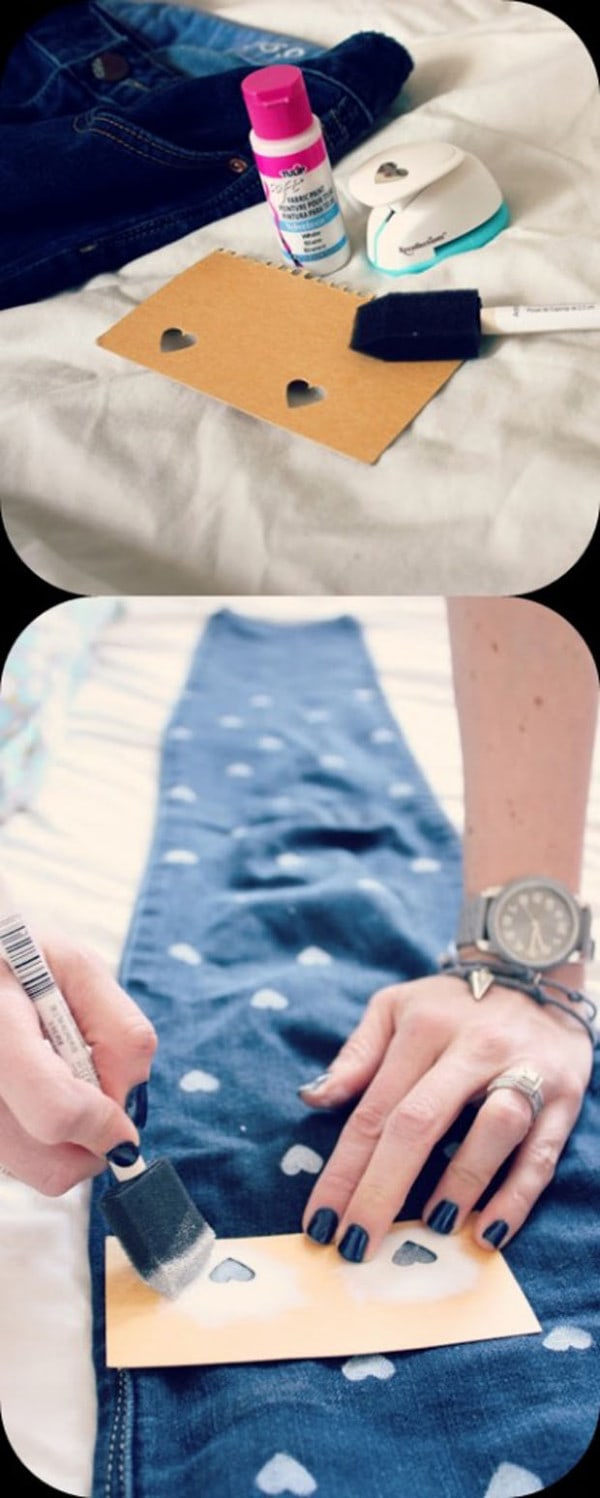
In the month of love, why don’t you try some DIY fashion projects full of love? Sounds great? Here is all you will need for your project: a pair of skinny or ankle cut jeans, a fabric removable pen or pencil, a piece of thin cardboard, a white fabric paint, rules, and a cosmetic sponge. These are the steps you need to follow for your project:
- Mark your jeans up to create a guide for your heart stencil.
- Cut a heart shape stencil from a small piece of cardboard to use as your paint stencil.
- Pour from the fabric paint onto a plate.
- Apply the paint using a small cosmetic sponge.
- Start stenciling from top to bottom, vertically.
- Repeat the same with the other pant leg.
- Try to be as asymmetrical as you can. Your new pants will look so adorable!

