Busy mornings are nothing new. We all live a life in which we are always in a hurry. Spending much time in the morning styling our hair is a real luxury most of us can’t afford. That is why we all search for some fast DIY hairstyle ideas that won’t take us much time in the morning. In this article, we have made a selection of some fast DIY hairstyle tutorials that you can follow and solve your “bad hair day” problems forever.
Scroll down the page to explore some inspiring fast DIY hairstyle ideas that won’t take you more than 10 minutes. Most of them can be styled both for a casual day at the office as well as for formal occasions like wedding parties. We are sure you will like them and you will try them on your hair the next morning. Until then, try to learn the easiest techniques and steps to get a super voluminous high ponytail or an elegant chestnut bun. Explore even more inspiring ideas by continuing to read the article. Enjoy!
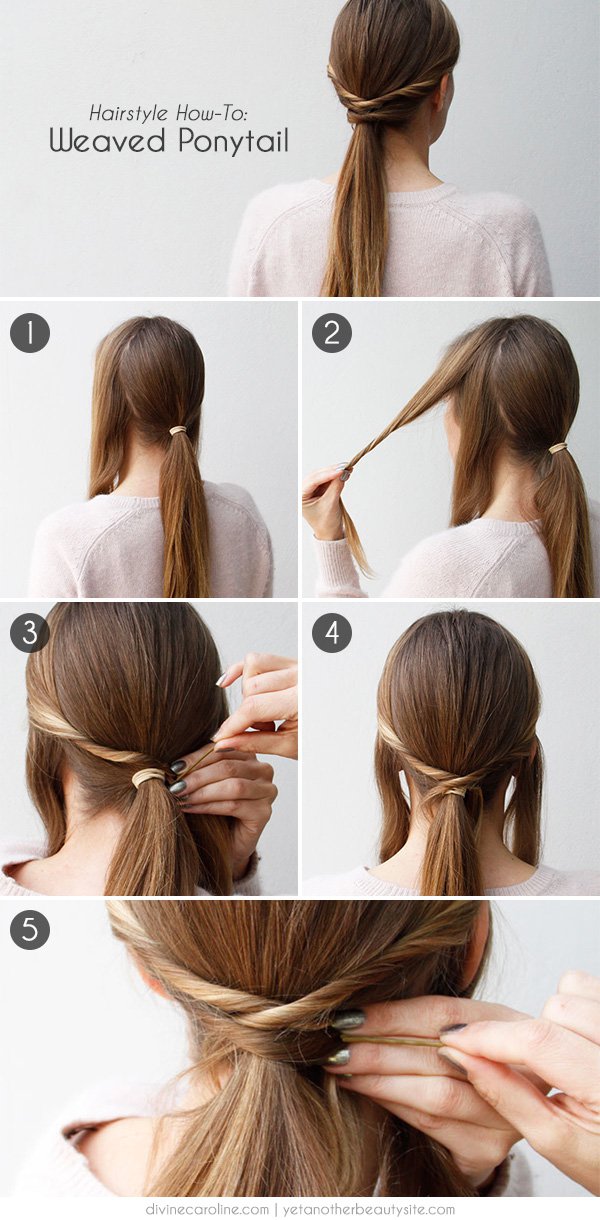
1. Weaved Ponytail
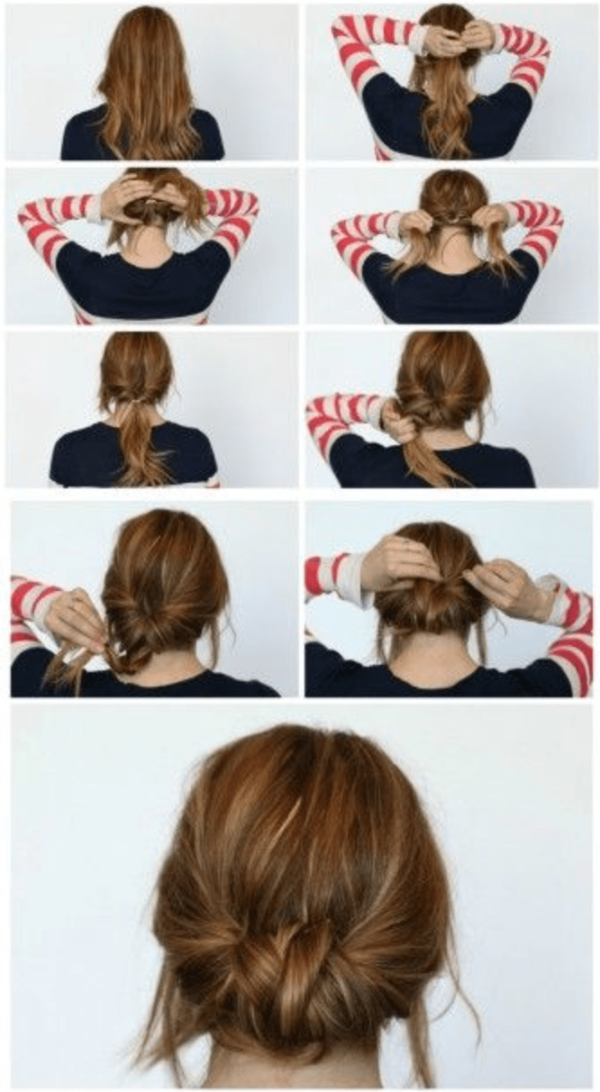
2. How to Make Chestnut Bun
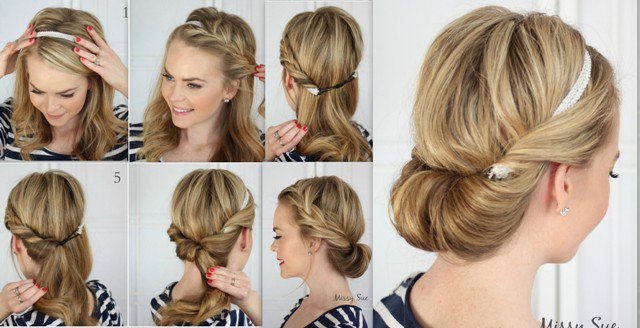
If you want a fast DIY hairstyle that you can rock even for formal occasions, then the chestnut bun hairstyle is the right choice for you. Below, we are sharing with you the steps to follow in order to get the hairstyle done to perfection:
- First, gather your hair into a high ponytail. Secure with a rubber band.
- Then, slide your rubber band down a little so it is no longer tight against your scalp.
- Next, create a little hole in the loosened part of the ponytail, in the area between the scalp and the rubber band.
- Pull the ponytail through the hole. Make sure you pull it up through the hole. Continue pulling until it hands over the top of the rubber band.
- Loop the end of the ponytail under the rubber band. If you have super long hair you may need to wrap the ends of the ponytail around the hand a few times before you tuck it under.
- Finally, pin the ends you just tucked using bobby pins. Secure well. Spray with hairspray for extra hold.
Voila, done!
3. Ponytail twist
4. Hair DIY using lace
5. Tuck and Cover Hair Tutorial
6. The Two Minute Low Braided Bun
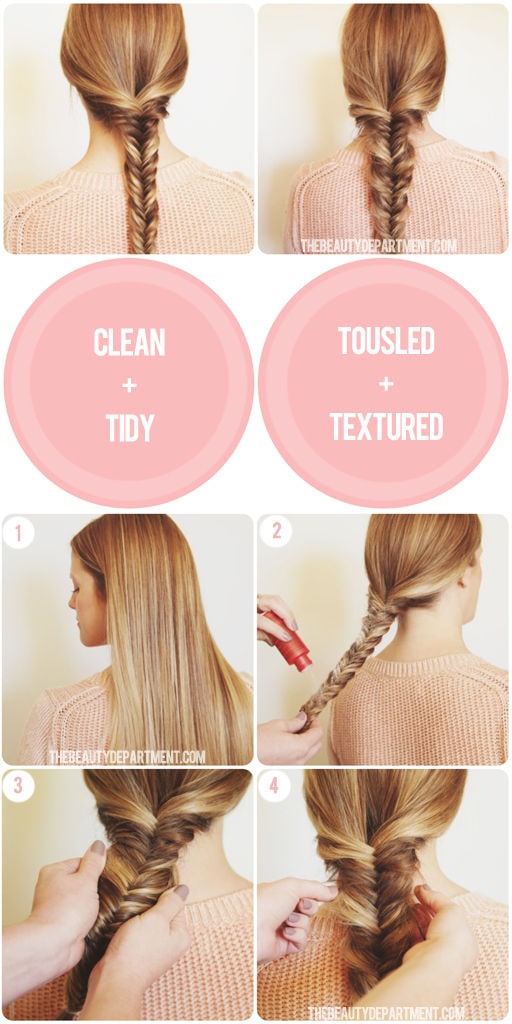
7. DIY fishtail braid hairstyle
8. Tutorial – Bohemic braiding
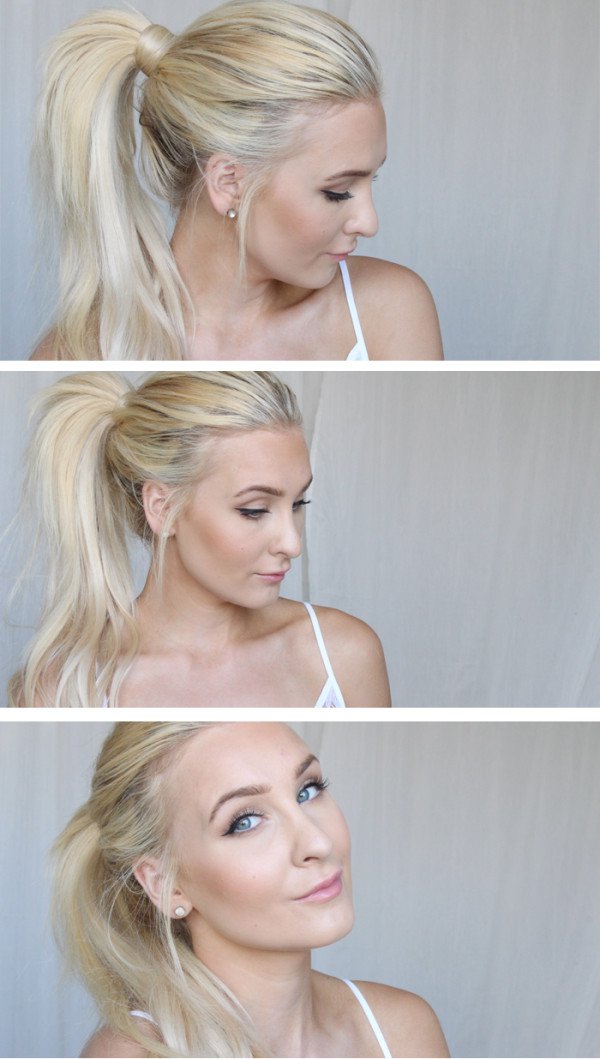
9. Fast DIY Hairstyle Tutorial – High Ponytail with Extra Volume
A ponytail is definitely that hairstyle that we all go for any time we need a fast DIY hairstyle. Here are the steps to follow in order to get the classic high ponytail with extra volume.
- First, separate a section of 2-3 inches at the front of your face on either side.
- Backcomb the rest of the hair with a teasing brush to create extra volume.
- Separate a section of hair from your ears. Take a 4-clip weft and clip it inside down at the roots in the direction that the ponytail will be gathered.
- Again, separate another section of hair at the crow of your head and clip a 3-clip weft upside down.
- Gather your hair into a high ponytail.
- Separate layers of the ponytail you created and begin teasing each layer at the roots using a teasing brush.
- Gather both front sections of hair, brushing the hair back with a teasing brush. Join the entire hair into the back ponytail and secure it with an elastic.
- Spray with hairspray to smooth the down flyaways.
- Separate the hair from the ponytail in a few sections. Start curling each of the sections to create a messier look.
- Finally, when you finish curling the sections from the ponytail, use texturizing mousse to mess the ponytail up.
- Using a teasing brush, tease the top of the ponytail in order to create even more volume.
Voila, your high and voluminous ponytail hairstyle is finished!
10. Pretty Ponytail: Try This Quick, Easy Twist on Tradition
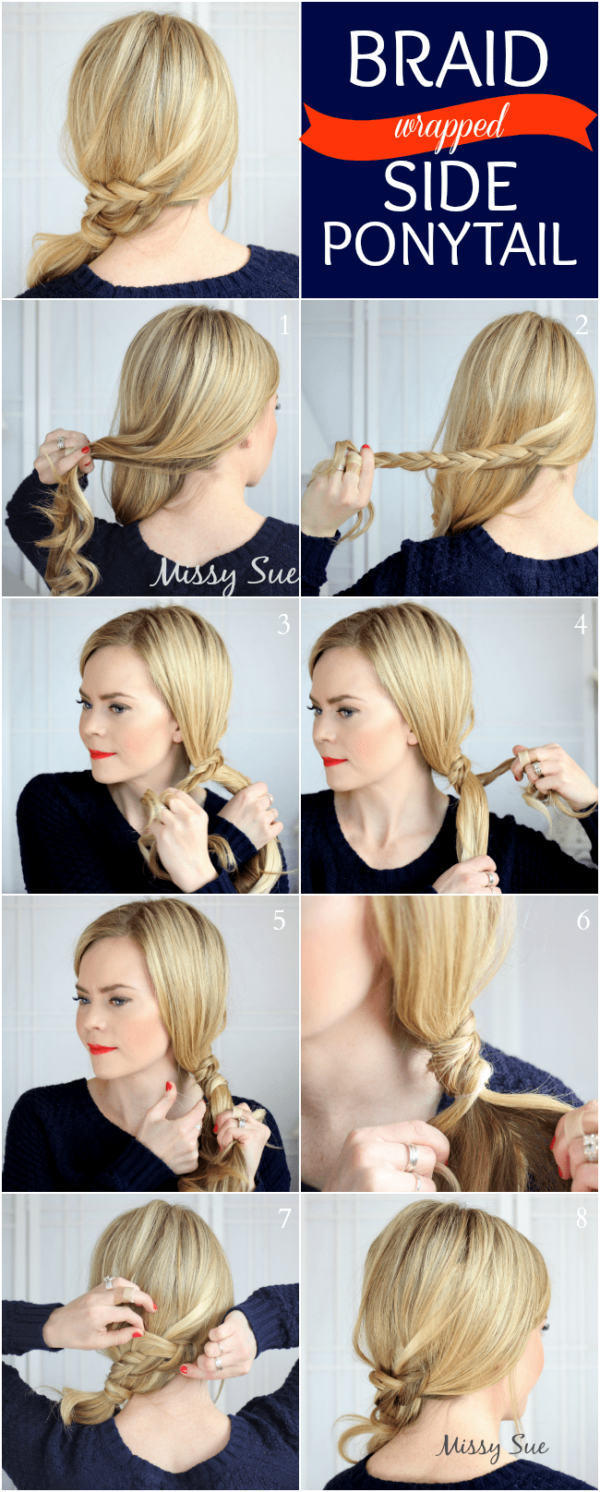
11. Braid-wrapped side ponytail
12. Tuck and cover Great Gatsby hairstyle
13. Tuck and cover French braid
If you enjoy braids in your hairstyle, then you will definitely adore this fast DIY hairstyle presented below. Follow the steps and create the best tuck and cover French braid.
- Start with a second-day hair which is easier to be manipulated.
- Split your hair into three equal sections at the hairline.
- Begin braiding your hair by crossing the right part over the middle a, and then the left over the middle.
- Continue braiding by adding hair from each respective side into a braid. The best is to braid into a loose but not too messy braid.
- When you reach the end of the braid, tie it using a small elastic hair tie.
- Finally, tuck the end of the braid under the base of the braid. Secure with a bobby pin.
Voila, you are done!

