Hello, DIY jewelry projects lovers! Are you ready for some adorable ways to DIY bracelets today? If yes, scroll down the page to explore some easy and adorable DIY bracelet projects that you must try immediately. Don’t miss them.
1. Zipper & chain bracelet
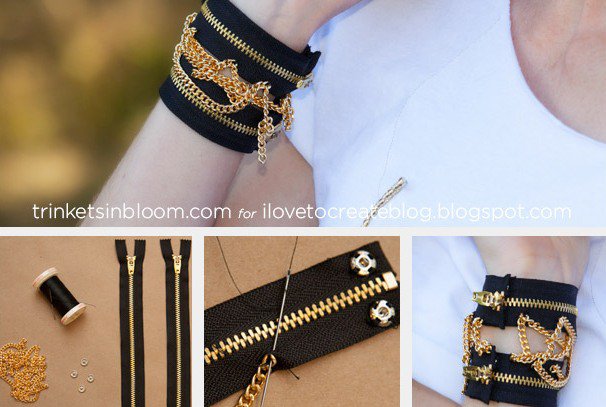
Are you ready for the easiest DIY bracelet projects ever? This DIY zipper and chain bracelet is a perfect way to add a little edge to your accessories box.
The Supplies:
For this DIY Zipper bracelet with chains you will need the following supplies:
- 2 Zippers
- Chain
- 4 Snaps
- Needle and thread
- Glue
The steps:
- Take two zippers. The best is to choose black ones like in the picture. Also, it is important to get ones that are long enough to go around your wrist with about a half-inch to overlap with the snaps.
- Use the needle and thread to fold over the ends of your zippers. Sew them down.
- Add a drop of the glue to the zipper on the place you want to put the snap. Wait for a little before the glue is dry enough and then press the snap over the glue drop.
- Wait to completely dry. Then, sew the snaps. Make sure to sew the convex end on the underside and the concave on the outside of the zipper. This way you can easily close your bracelet once when you wrap it around the wrist. Sew one snap on both ends, to both zippers.
- Start sewing the chain. You can cut it into small pieces or you can keep it long while sewing it between the two zippers. Make sure you tack it securely to the zippers.
Your DIY bracelet project is done! You have already a new DIY zipper and chain bracelet in your jewelry box that you will be proud of.
2. DIY Bracelet using Nuts
3. Wrapped & Beaded DIY Bracelet
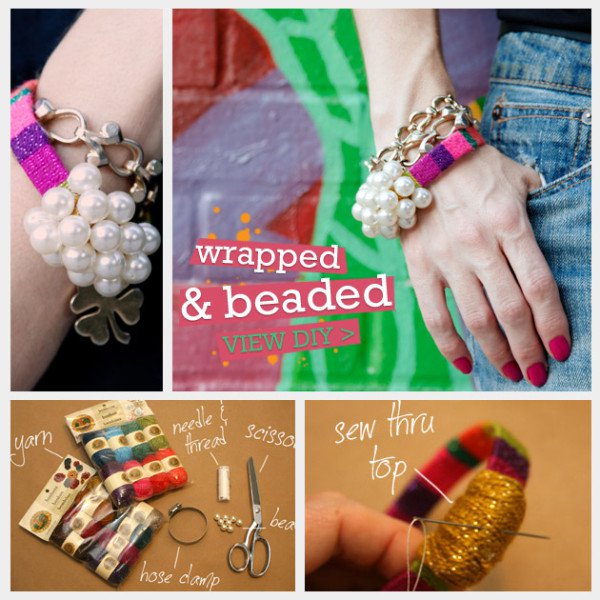
Another amazing DIY bracelet project that you must try! You will certainly enjoy wearing this wrapped and beaded DIY bracelet.
The supplies:
For it, you will need the following supplies:
- A pack of yarn in 100% Acrylic with sparkle
- A large hose clamp
- Lots of big beads
- Needle and thread
- Hot glue
- Scissors
The steps:
- First, make sure that you can easily put your hand in and out the hose clamp. If yes, you can start with the project.
- Take one color of the yarn and the glue. Place a small amount of the glue onto the hose clamp and put the end of the yarn in it to hold it.
- Then start wrapping the yarn around the ring of the hose clamp. Make sure to pull the yarn firmly. Put a little glue on the end and secure the yarn to it. Snip off the extra yarn.
Once you are done with the first color, take the second color and repeat the same procedure. - Continue doing the same with each next color of yarn until the entire ring of the hose clamp is covered.
- Take the beads and the needle and thread. With some basic sewing skills start sewing the beads to the top part of the wrapped hose clamp bracelet. Sew each of them several times to be sure that they will stay in place. Add enough beads to cover the top area of the bracelet.
You are finally done!
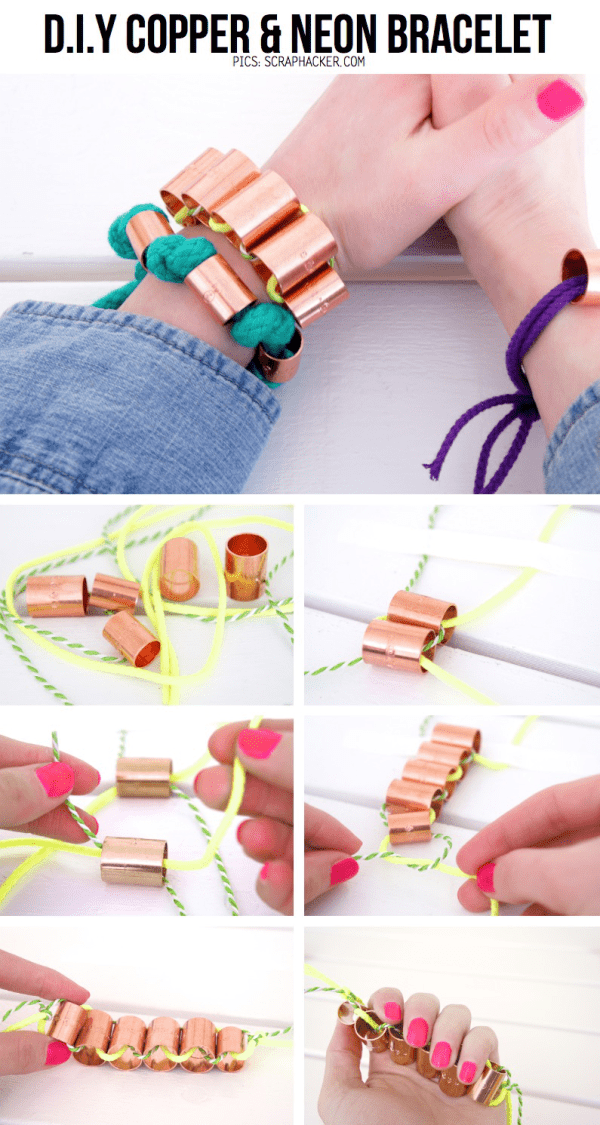
4. Tutorial: Copper & Neon Bracelet
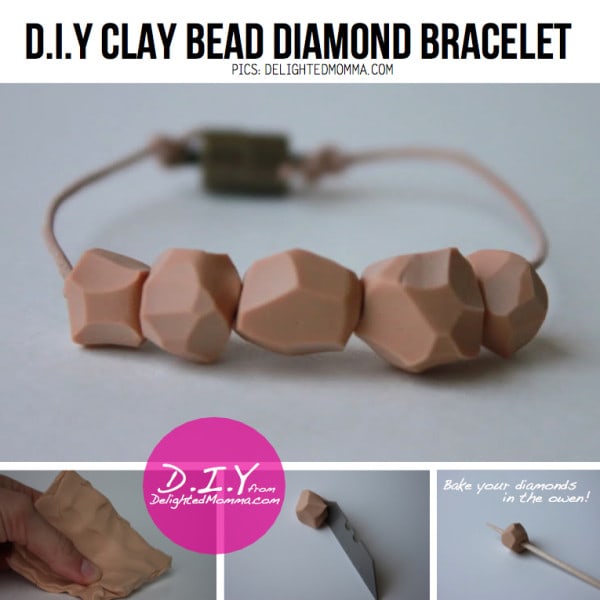
5. DIY polymer clay beads
The easiest DIY bracelet project is waiting for you. Don’t miss trying this adorable DIY bracelet. Since it is so easy and so inspiring, you can include your kids in the making process too. DIY polymer clay beads bracelet for the entire family? Sound great!
The supplies
Here is what you will need for your DIY bracelet project:
- Polymer clay block
- Razor blade
- Cord
- Toothpick
- Magnetic closure
The steps:
Here are the steps to make your dream bracelet:
- First, knead the clay until it gets and soft texture and becomes pliable.
- Once it is ready to work with it, start rolling the balls. You can make However balls you wish to use for the bracelet.
- Use the razor blade to slice off the little pieces until you get the desired shape of the balls.
- Then, using the toothpick, poke a hole in the center of the balls.
- When your balls are done, put them on a baking tray and bake for about 15 minutes at 275 degrees.
- Finally, attach the meatal closure on one end and start threading your beads through. You can tie two little knots on the place you want to be the first and the last bead so that you keep them from moving.
- Attach the other closure and voila, your DIY bracelet is done!
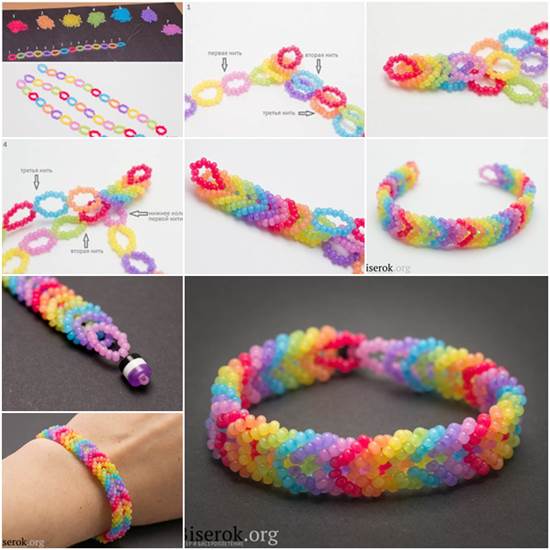
6. DIY Rainbow Color Woven Beaded Bracelet
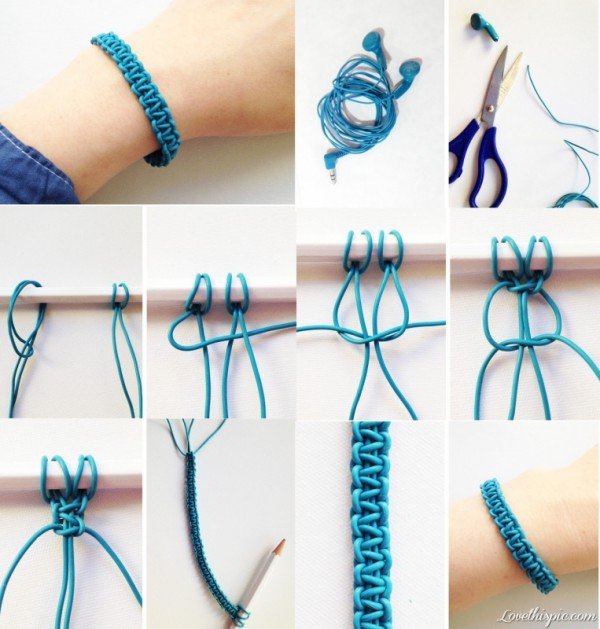
7. DIY Braided Bracelet
Are you in for a cool DIY bracelet project that won’t take you more than five minutes? If yes, scroll down to see the needed supplies and the easiest step-by-step tutorial ever.
What you will need:
Here we have listed the needed supplies for your project:
- Old headphones
- Scissors
- Pencil
The steps:
- First, cut the ends of the headphones using scissors. Once done, cut the resulting cable into two equal pieces.
- Take the pencil and put each of the wires into two. Attach them to the pencil as shown in the tutorial.
- Gather the wires as close as possible. Start making knots between each other until you get the desired length.
- Once you have finished and gotten the desired length make a big knot at the end of the bracelet. Don’t forget to leave a little wire that you can use to secure the bracelet when wearing it.
- Take the pencil out. Tie the end together and enjoy wearing your new bracelet.

